Let's continue with the solution of The Last of Us in the Borderland:
Part 1: the outside of the quarantine zone
Once you are reunited with Tess, pick up the note on the table and exit. Talk to Tess (who will be by the window), then follow her through the hole in the wall near the bookcase. Turn on the generator (you will have to press the triangle button when the indicator is in the highlighted area) to power up the elevator, then use it to go down. Once down, pick up the vigilante path note, then go to the opening with the red light on the wall.
Climb the ladder and continue until you reach the truck; keep going and you will be ambushed. You will need to watch the cutscene before you can continue. At the end of the cutscene, crouch down and follow Tess, avoiding the spotlights of the enemies who will be looking for you. Run the last stretch to hide in the sewers.
Also in the sewers you will find some soldiers who will be looking for you: stay on the left and use the wall as a shelter so as not to be seen. Continue adjacent to the wall until you slip into another sewer pipe. Continue until the water is no deeper, then further on where the path rises a little. At this point other soldiers will appear and shoot at you: stay on the left and continue crouching until you enter the house nearby. Go up the stairs and jump upstairs to enter the building opposite. Here, follow the path to the garage door and open it.
Stay hidden behind the police car and tank to enter the nearby building. Once inside, stay as far to the right as possible and use a bottle or brick against the police car to attract the attention of the guards in that direction and silently dispose of them.
Still watching out for the guards nearby, continue along the road and through the truck until you jump into a depression in the asphalt. Here take yet another sewer tunnel and continue to the foundations of the next building, where you will have to take the stairs to go up. Crouch through the hole in the wall, then stay hidden for a few seconds until the guards are gone. Cross the room and go to the opposite side to find items and consumables to collect, both on the ground and in the nearby lockers.
Once you have collected everything, retrace your steps and continue along the tunnels until you reach the grating on the other side of the area.
Part 2: the city center
After the cutscene, follow Tess into the street. Near the destroyed bridge, check the ground for items to collect, then continue along the road. You will hear a sound (no enemy will show up for the moment) as you climb up.
When you can no longer go on, look to the right and continue inside the semi-destroyed building. If before entering the building you control the small park, on one of the trees you can collect a tag of lights (you will have to shoot it at a bullet to make it fall to the ground and be able to take it).
Go back to the building and continue. When you find the dead guard, collect the items and collectibles near the body, then continue up the stairs (on the top floor there are other useful items, don't forget to check the whole area before leaving).
Go back to level 5 and watch out for the Clicker. Search the various rooms collecting items until the enemy attacks you. Get rid of it and move on. After the fight, turn your attention to the closed door nearby - you'll have to waste a pair of scissors to open it, but you'll find many useful items inside. Once you have everything, go back to the corridor.
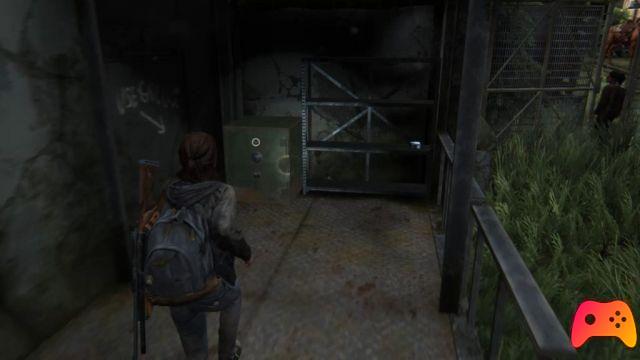
Continue along the new path, help Tess up, pay attention to the Clicker and continue to the wooden barrier. Use the ladder and the crate to create a passage so that Tess and Ellie can continue. Continue along the path and look for the broken window to continue. When you hear the sounds emitted by the enemies, stay alert (gun in hand). Collect the iron pipe you will encounter along the way and continue. Stay hidden and get rid of as many enemies as you can. Once the room is cleared, Tess will help you open the door to enter the next area. Here, after collecting some useful items, you will have to go down to the subway. Along the way you will find two Dead Lights, from which to collect a Molotov cocktail and a collectible. Detach the subway map from the wall next to the machines, then crouch past the narrow passage to the next room, very large and full of Clickers. Move with extreme caution and keep in mind that, in addition to the Clickers, there is also a Runner in the room, at the bottom left. Try to get rid of the enemies in stealth mode, otherwise it will be almost impossible to survive. In the shop on the left of the metro you will find a desk with the combination of a safe in a drawer, to be used to collect other useful items.
To complete the area you just have to go to the opposite side of the large room, up to the grate. Here you will have to help Tess climb to get her to unhook the ladder that you will use to go up and continue to the road.
Part 3: the museum
Enter the large room and take out the infected there, then move the garbage can to get on the truck and pass it. As soon as you jump off the truck, immediately turn to find a collectible in the small hole to the right.
Now run, quickly open the garage door and enter. Use the work table to upgrade your arsenal, collect the pills near the truck and then continue by opening the door near the work table. Continue and open the door in front to collect some useful items, then continue opening the door on the left. Go through the large room you will find yourself in (still picking up items along the way) and go upstairs. Before entering the room on the right, you can climb left to collect a tag of the Lights.
You will find yourself inside the museum: continue until you have to crouch to continue into the opening. Move the beam to let Tess and Ellie pass, but they won't make it: the wall will collapse between you separating you and, as if that weren't enough, Clickers will arrive. Continue along the only other path available. Further on you will find a door to open with scissors: as always, the scissors will break but inside the room you will find several useful items. Retrace your steps and continue paying attention to the Clickers as you continue up the stairs. Go up a couple of floors to the open door. Kill the Runner who is trying to break through the door at the end of the hall, then open it to find Tess and Ellie safe and sound. Exit the window and go up the fire escape. Once on the roof, use the wooden plank to create a passage to the roof opposite, towards the building with the logo of the Lights.
Part 4: the government building
From the roof, use the stairs to go down to street level. Collect the collectible from the corpse that you will find once down and continue to the closed gate. Push the garbage can nearby to be able to pass the grating and get to the main road. Cross the water on the left and jump in front of the building. There is a plate of Lights on the ground: collect it and continue inside.
After the cutscene go up to the second floor (you will be in the same room but in a higher position), then quickly go to the third room on the same level and jump over the broken floor. Collect the shotgun and continue staying hidden. Get rid of the guards and continue on your way. You will have to take out several guards, so make sure you know their location at all times using Joel's hearing. Once all the enemies have been eliminated, go down using the stairs.
Kill the last remaining guards (in stealth mode or by engaging in a shootout, the choice is yours), then when you are on the street go down again inside the subway. At this point other guards will show up and you will have to run to escape them. When you reach the room full of spores, silently kill the two guards present and go down the rails, going to the left. Get into the train and go through the wagons.
Once you reach the water, swim (you can even dive) and explore the area, while Ellie will stay safe on land and find a torch. Rejoin the little girl and collect the collectible that will be near her, then continue and dive again to explore the seabed: you will find an entire house under the surface of the water, and swimming inside it you can collect a plate of the Lights.
Back on the surface, use the pallet to make Ellie (the baby can't swim) get on it and carry her to the other side of the area, where you too can get out of the water using the ladder. Continue to climb along the obligatory path until you return to the street.


