This solution was written with minimal references to the plot: for this reason it does not contain revelations that could ruin the story.
Since this solution shows only the bare essentials to complete the game, to fully understand and enjoy the game and the plot it is recommended to use it only in case of need.
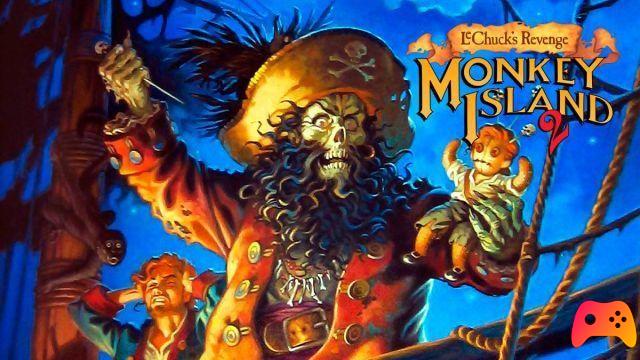
Part I: Largo's embargo
After the opening scene, here you are on the doorstep of Woodtick, on the island of Scabb.
"Collect" the prohibition sign with the shovel attached to collect it, then go to the right or left to make the unwelcome acquaintance of Largo Lagrande. Say what you want, the result will not change one comma: if you want you can even skip the entire speech by pressing the right and left mouse button at the same time.
We continue to Woodtick. Enter the first house you find: it is the carpenter's house. Collect some nails from the barrel to the left of the counter the man and hammer is working on above, then go back outside. Now go left and enter the overturned wreck on the same side of the walkway as the carpenter's house: it's the house of Wally, the cartographer. Here you just have to take a piece of paper from the pile in the right corner, then go back outside.
Now you will need to enter the bar: it is located in the hold of the ship which has a sign with a cocktail attached to one of the masts. Go through the hatch and talk to the bartender: ask him how business is going. Once the skit is finished, use the piece of paper with Largo's spit to pick it up: if you skipped the skit, it's the green patch on the far left pylon. Talk to the bartender again, this time asking him about the stew. The bartender will offer you to become his cook: accept. Enter the kitchen, take the knife on the table and exit through the open window.
Now go to the leftmost ship with the red and white curtain in front of the entrance. Use the knife to cut the rope that binds the baby alligator: now you have the green light. Open the door to the left of the reception and enter the room. Largo LaGrande lives here. Grab the mannequin-headed wig on the left chest of drawers and the clean white T-shirt from the bed. Exit the hotel and go to the right end of the town, over the bridge, to reach the Scabb map.
First, take a trip to the cemetery on the southeastern peninsula. Go up the hill at the bottom: by moving the mouse on the grass on the top of the hill the words "grave" should appear. Dig into that spot with the shovel.
Go back to the map and go to the swamp, which is located in the middle of the east coast of the island, where the river branches off to the sea. Use the coffin and continue to the right until you reach the "hut". Once inside, go right and you will meet the voodoo priestess.
Ask her how business is going, then ask her to tell you about Largo and why she doesn't cast a spell on Largo. Finally, she will mention the spell that interests you: ask her what ingredients she needs, and since you already have them, give them to her. You can finally take revenge on Largo.
Go back to Woodtick, go to the hotel and enter Largo's room. Don't listen to it: use the pins with the doll. At the end of the scene, return to the map and this time go to the narrow southwestern peninsula. Talk to the boy and ask him to rent the ship to enter the ...
Part II: The Four Pieces of the Map
Grab the parrot's food (one of the white bags next to the door) and go inside. Ask Dread what choices you have and you'll receive a map showing three islands: the one you started from, Scabb, and two more, Booty and Phatt.
The first island you need to visit is Phatt. As soon as you get off, a warm welcome awaits you: choose the dialogue options you prefer, they are irrelevant. You will regain control in the cell. Pull the mattress of the bed and take the splint placed diagonally, then use it with the leg bone of the skeleton and pick it up. Give the bone to the dog and collect the keys, use them to open the cell, take the brown envelope from the first shelf of the desk and open it, then exit.
Head right to return to the dock where you disembarked.
On the road that runs alongside the pier you should see an alley between the prison and the library: enter it. Talk to the man and make a bet. Bet on a random number, you can't lose: take the invitation, it's the only thing that interests you. Go back to the dock and enter the library.
Talk to the librarian, ask for a book, then how to get the subscription and give her the information as you like: you will get the temporary card.
Leave the harbor by continuing along the pier to the right or via the path past the prison to the left. Once you reach the map, go to the waterfall at the mouth of the river on the west coast. Once you reach the place, enter the hole in the rock and continue to the left until you come out on a beach. Go to the little house at the top of the hill.
Enter the house and go left: it shouldn't be difficult to locate the trap door, to the left of the table and under a bare part of the wall. Open it to fall into it: you'll reach a small room with a skeleton in a bathtub holding a piece of the map. Take it and exit the hole on the left.
Go back to Dread's ship - you can do this either from the map or from the port. The time has come to visit Booty Island. Enter the small house on the left: it is an emporium. Buy the piece of map that is on the counter. Now you only need two!
Exit the shop and enter the costume shop next door. Give the owner your invitation to get the costume you need to wear to the governor's party. Take the costume, go out.
Go right and enter Stan's coffin shop. Ask for a good used coffin: as soon as he enters it, use the nails on the coffin to lock it inside. Take the key hanging from the huge plaque behind the counter and exit, continue right and you will reach the map.
Go to the islet in the northwest of the island. After the skit, you say you're there for the governor's party. Show your costume and invitation and you can pass. Continue to the right to reach the villa. Open the door and enter: in the frame on the fireplace on the left there is what is right for you. Collect the piece of map and exit. Go to the gardens; you will be stopped by the dog. There is nothing to do: say what you want, you will be led by the governor himself.
You'll find yourself in Elaine's room and you'll have to break through her heart to get away with it: choose the most romantic and dull answers and you're done. After the discussion, go out and collect the map, which will finally remain in your possession.
On this island you are done: return to Dread's ship and sail for Scabb. You will automatically arrive in Woodtick. Go to the island map and go to the cemetery. Remember the key you got in Stan's shop? The time has come to use it to open the cemetery crypt. Do you see the two buildings with the sloping roof placed side by side? The crypt is the one on your right. Use the key with the skull on it and enter. You will need to open Rapp Scallion's coffin, which is right in front of the stairs - make sure it's the right one by examining it. Once you have identified the right coffin, open it and examine it. A piece of map will peek out in a pile of remains.
Now that you have the map, you will need a cartographer. Go to Wally in Woodtick and give him the map, any piece, and he will help you in exchange for a commission. So go to the swamp and return to the voodoo priestess to receive a bag. Examine it for matches and a Love Bomb. Go back to Wally, then go to the swamp one more time - you'll see a wooden chest. Open it and "use" it to get inside.
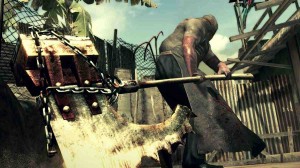
Part III: LeChuck Fortress
After the scene, go to the right, go through the passage in the wall and enter the door at the top of the stairs. You will find yourself in front of an arch, behind which there are two galleries: enter any one. You will find yourself in a corridor with two doors at the ends: from one you will arrive, while the other is where you need to go (the position varies depending on whether you went right or left starting from the arch). Be that as it may, you will reach a door with several padlocks: open it to discover that there is a hidden door in the middle of the larger door. Cross it.
Collect the skull shaped key hanging above the altar. An irrelevant speech will follow: say what you want or skip it. Talk to Wally and ask if he has any ideas. You will find yourself in the dark: it is the right time to use a match.
Part IV: Dinky Island
Go right. Pick up the crowbar on the ground near the crates. Open the barrel to get some crackers that you will give to the parrot: it will give you directions. If you don't have time to wank them, don't despair: the parrot will keep repeating them from time to time. Now go left and enter the jungle through the dark opening. Go east to reach a clearing with a pond and a chest: pick up the rope the chest is tied with, open it with the crowbar and pick up the dynamite. The time has come to follow the parrot's instructions - they should be broken down into three stages. If for example the indications are:
"East to the dinosaur"
"North from the dinosaur to the pile of rocks"
"East from the rock pile to the X"
It means that, from the pond, you have to keep going east until you reach the dinosaur (a dinosaur-shaped bush, actually), then from there to the north until you reach the pile of rocks and, finally, continue east. to reach the X.
Once you reach the X you have to dig with the shovel, then light the dynamite and put it in the hole. Use the crowbar with the rope and use this grappling hook on the metal rods on the edge of the hole above the chest.
You will find yourself once again in the dark. There is a switch: put the pointer about two thirds of the bottom of the screen and then go up half the height and you will find it. If it is not clear to you, move the zigzag pointer from right to left as you go down: you will find it for sure. Use the switch and a dialogue will begin. Carry it out as you wish.
Whenever LeChuck finds you he will transport you to a different place in the Dinky Island dungeons. Try to orient yourself as best you can: the basement is a corridor divided into five sections, some of which have a door leading to a room (or, in one case, to the elevator). Here are the sections from left to right with the rooms to access and what you need to do:
1) Initial section - There are no rooms.
This is where you turned on the switch. There is nothing to do.
2) Lift section - Here you find the elevator.
When you have the balloon and gloves inflated with helium call the elevator with the call button on the left and enter the elevator, then wait for LeChuck to appear and quickly use the lever on the left. LeChuck's beard will get caught in the doors - pick it up.
3) Third Section - To the left of the door there are three yellow arrows and the word "elevator"
In the room there is a coke dispenser and a helium canister:
- As soon as you get the gloves and the balloon, inflate them with the helium tank (the green tank)
-Use the coin return button of the vending machine located at the top right and hide to the right. As soon as LeChuck walks in and bends over to take the coin, pick up the underwear he is wearing.
4) Fourth Section - To the right of the door there are three arrows with "First aid" underneath
The room is full of boxes. There are five of them on the ground: open the one closest to the screen and pick up a doll, then open the leftmost one and pick up a balloon.
5) Final section - Last section
The room is a kind of infirmary with two skeletons on a sofa.
Collect the skull from one of the skeletons, then open the basket next to the bed on the right and pick up the gloves. Open the nightstand drawer next to the cot and take the syringe.
The beard, the skull and the underwear are ingredients for a voodoo doll that you will have to build: to get a liquid of his body you will have to wait for LeChuck in any room and quickly give him Stan's handkerchief. Since you don't have much time you will have to keep your inventory at the right point and the mouse already on the "Come on" box, ready to give him the tissue as soon as it appears.
When you have the four ingredients, put them in the pink bag in which the bomb was together with the doll: you will have a LeChuck voodoo doll.
Wait for LeChuck and use the syringe on the doll, then chase LeChuck and rip a leg off the doll. Agree to get closer to LeChuck, then continue the dialogue: the final cutscene will soon begin and end the game.