[FIRST PART OF THE SOLUTION]
Before starting the actual solution, the short and explanatory legend that follows will illustrate the terms used most frequently during it:
MOV = Movements. When this abbreviation appears it will mean that you will have to follow the steps described to get to the next stage of the plot. There are 4 possible directions, that is LOW, TOP, RIGHT, LEFT. The number that precedes the aforementioned terms will indicate how many steps of that type must be taken to proceed.
-----------------------------------
The first part of the adventure will be dedicated to a short and explanatory tutorial that will guide you in the first steps of the game helping you to familiarize yourself with the controls. You will find yourself in the role of a mysterious warrior caught in the fight against a bitter and difficult enemy, Jackel.
Defeating this first opponent is quite easy, in fact you just have to hit him with your sword and be careful when he uses his move, which is quite predictable.
After neutralizing the threat, talk to Willy, who you will find nearby. The latter will go away and you will have to go UP, RIGHT and exit using the ladder. From there, go LEFT.
It will therefore be necessary to defeat the stubborn Jackel for the second time.
After beating him, head to the gate, leave the castle and turn left to go “involuntarily” hear the discussion between Julius and the Dark Lord.
Unfortunately for you, the latter will notice you and in no time you will find yourself swooping down like a boiled potato down the waterfall.
From where you will wake up, follow the following pattern
(2) RIGHT, BOTTOM, (2) RIGHT, BOTTOM
Then make a clean sweep of the monsters of the place and talk to the boy nearby. Once this is done, take the graceful damsel with you. Again, you'll have to walk
(2) RIGHT, TOP, LEFT, TOP, (2) LEFT, TOP, LEFT, TOP, BOTTOM, LEFT, TOP
Enter the filthy hut and talk to the local guy, take the pickaxe and leave the dismal place
BOTTOM, RIGHT, TOP, BOTTOM, (2) RIGHT
Enter the cave and use the new pickaxe to dust off the rocks blocking your way
(2) LOW, go upstairs, (2) RIGHT, LOWER, RIGHT
At this point a visit to the shop won't hurt; buy yourself a beautiful shiny battle ax ready to be soaked in the bodies of your enemies. After doing the necessary shopping, exit the shop and continue towards
RIGHT, (2) BOTTOM, (3) LEFT
Enter the building that will appear in front of you, turn left and then up. Enjoy the skit that follows.
After the short interlude, go
BOTTOM, LEFT, BOTTOM, (3) RIGHT, BOTTOM
and put an end to the sufferings of Lizardmen, the unfortunate boss who comes before you. After taking possession of the BRONZE KEY, do
UP, RIGHT, UP and enter the door.
And here you are at the Cave of Marsh! Talk to the little man there and answer "Yes" when necessary. Go UP and then LEFT and, after leaning on the switch there, access the lower floor. Head right to get to another cave. Go RIGHT then DOWN and use your trusty pickaxe again to clear the way. To your great joy, you will now come into the possession of the SICKLE, an excellent weapon also essential to proceed in some points of the game. Use it to get rid of the ivy (herbaceous monsters) and go UP and LEFT, go upstairs and then head right and enter yet another cave (this place is full of them!).
RIGHT, (2) LOW, LEFT, use pickaxe, (2) LEFT, UP, RIGHT
Exterminate with the usual ferocity and the usual sadism the monsters who will presume to want to stop you and take possession of the powerful IRON SHIELD. After feasting your eyes on the glint of the mighty shield, go
LEFT, UP, RIGHT, smash the rocks with a pickaxe and go down one floor, LOW, LEFT and enter the cave, LEFT, LOWER, RIGHT
Then press the first switch and destroy the rocks that block the v pass; Then hit the second switch and head downstairs and then RIGHT.
The boss you have to slaughter now doesn't have a precise name, but that doesn't matter since you just have to let him taste the power of your new weapon. Use the new SICKLE to beat him and heal yourself with the CURE magic. Being similar to a dragon, it was assumed that among his gadgets there was also the possibility of throwing fireballs; to remedy the problem just knowing how to dodge the shots at the right time. Once the monster is reduced to a useless carcass devoured by crows, first steal the FIRE magic from it, then tear the chest to pieces to take possession of the second object, the mirror.
Leave the unhealthy cave now by heading to
LOW, (4) LEFT
and enter the nefarious place, equip the mirror and talk to the boy, who will immediately turn into a disgusting vampire. Using the just-taken FIRE magic, it will be a joke to reduce poor Dracula jr to ashes.
From the entrance, now go to (2) RIGHT, UP, LEFT, go upstairs, LOW, RIGHT and break the wall with the pickaxe, UP, RIGHT, (2) LOW, LEFT, smash the pots (that kind of obstacle ) and lean on the switch, go down the floor, RIGHT, (2) UP
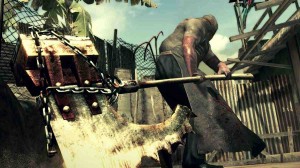
A fresh new weapon awaits you here; it is the CHAIN, with which you will reap death and destruction in the ranks of the enemies.
Hit the switch, (2) LOW, LEFT, go up the floor twice, LEFT, use the CHAIN to cross the river, LOW, UP breaking rocks, smash the pots and go UP
Using your boundless wits, it will be easy for you to understand that you have to place the chest on top of the switch to continue and descend the floor.
Break the pot and go down the floor, then do RIGHT, DOWN. The girl is in the lowest row of coffins, three from the right. Now you just have to go back from here (following the opposite movements as before).
You will arrive in front of the next boss, Lee, which you will have to fill with binder as usual to make him understand who is in charge.
You can use either a combination such as CURA / CHAIN or, although less effective, one such as FIRE / CURE. Submissive even this umpteenth deluded, you do
(3) RIGHT, BOTTOM, LEFT, BOTTOM, LEFT, TOP, BOTTOM, RIGHT, (2) BOTTOM, RIGHT, TOP and enter the happy village.
You should now take a moment of peace chatting with the locals and, why not, squandering some useless money (not so much, more
forward you'll need it!) junk; and then they say that only women waste time shopping.
When you have finished throwing away part of your life fooling around here and there, go to (4) HIGH from the entrance.
Enjoy the interesting interlude and get ready to hunt down the kidnapper.
Your goal is now to recover the sweet girl and snatch her from the clutches of the "scoundrel". Get out of the city doing (3) LOW and watch another amazing interlude.
Eventually you will have to go to Cibba's palace and prepare to use a very useful and wonderful means of transport, the Airship. No more speed limits and auxiliary stops (joke ... not so much, however ...)!
From where you are, go towards
(6) LOW, (2) LEFT, LOW, (2) LEFT, and enter the cave
In truth, the only reason why it is worth staying in this barren land is the presence of nice dwarves who sell nice stuff and always useful for our trip; but remember to keep some money with you because soon you will need it badly… go to
HIGH, (2) LOW, RIGHT
Enter the shop and buy the oil; unfortunately it is very expensive and also essential for the adventure. Once you get it, go out and do
(4) TOP, LEFT
and enter the cave (yes, yet another putrid ravine touches you ...) equipping the oil. It would also be wise to do a data backup now, before pulling all the saints out of heaven. Soon take the RAIL!
Inside the mine, you can see the presence of three levers; the first you see you have to let go, while you have to use your weapon to hit the second. If you did everything right, RAIL will react to send you in another direction.
The third lever that you will find immediately after must also be hit. If all went according to plan, you should now find yourself hitting a rock and flying into a large well.
Watts, one of the dwarves, will find you and, seized by deep pain (what a shame ...), will help you. Take advantage of this and spend some time examining the items he sells on his street stall (but he'll keep everything in his pocket… !?). Do it now
UP, (2) RIGHT, use the now worn and faithful pickaxe, press the switch and access the lower floor and then go DOWN and face another monster (the list is still long ...) named Megapede.
Use CHAIN and heal when needed until the enemy is reduced to cat food.
Once you have defeated and taken the contents of the chest, Watts will grab the silver and you will have to go to
RIGHT, (3) LOW, LEFT, enter the cave, LOW
and talk to Watts. It's time to squander your hard-earned savings to take advantage of the missing liquidation of silver equipment! After all, you also need them to continue with the story, so… there is little to choose from! Put on the shiny new clothing, exit the cave and do it
HIGH, LEFT, (2) HIGH, and enter the cave (but there are only caves here !?) of Gaia. Fate
LEFT, (2) LOW, enter the room and enjoy the scene.
You will discover that Bogard, no one knows by what means, has managed to follow you this far. At this point go towards
LOW, LEFT, (2) HIGH, LEFT, HIGH, LEFT, and enter the house.
Finally you can replace the now worn out helmet you have by changing it with a more effective silver helmet (it is not mandatory, if you really like the old one ... your cabbages!). Now do it
(2) RIGHT, UP, RIGHT, UP, wait for the right moment and continue with RIGHT, (2) LEFT, RIGHT, LEFT, (2) UP
You are now at the Airship and you must do
(2) UP, LEFT, DOWN and enter the door, (3) LEFT, UP, RIGHT, go down floor, LEFT, DOWN, use the right switch and then the left one, go down to the lower floor, (2) LEFT, LOW, go through the small gate and talk to the girl, then go UP, (2) RIGHT, go up floor, UP, LEFT, go up again, LOW, and talk to the guy to find some information (if you give a damn about the story ... otherwise pretend the boy doesn't exist ...). Then go (2) LEFT, UP, smash the pots and go upstairs, RIGHT, UP, (2) LEFT, LOW, RIGHT, LOW, RIGHT, and converse with the girl. Another interlude will now come to enjoy in peace.
END OF PART 1