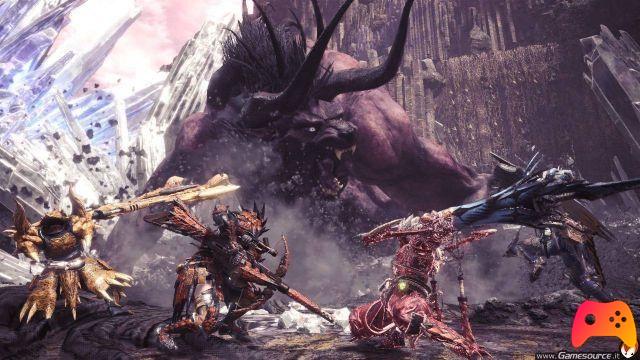
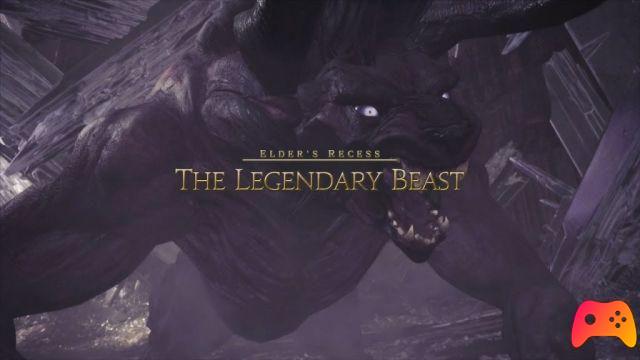
With the arrival of the heat of August, the heat also arrives in the Land of Crystals in Monster Hunter World, thanks to the arrival of the highly anticipated Behemoth. This “docile” creature that has made countless appearances in Final Fantasy comes to the new World thanks to a collaboration with Final Fantasy XIV. In this article we will try to guide you to end his rule, but we can assure you that it will not be easy at all.
Given that the Behemoth will only be playable by hunters who have reached GC 16, that is, having concluded the main plot of Monster Hunter World, we will focus only on its mission, assuming that you have already passed the introductory quest to the collaboration that sees the clash with a particularly enhanced Kulu Ya-Ku and the one relating to putting to flight the Behemoth the first time.
First, here's a fact sheet about the Behemoth's weaknesses and resistances:
- Weaknesses: Dragon, Water (albeit in a lighter way than the first element).
- Resistances: Thunder, Fire.
- Stick with: Thunder, Fire.
- It can inflict Status: Sunburn, Paralysis, Bleeding.
- Immune to traps: Yes.
- Breakable body parts: Horns and Tail, however, severely scratching its front legs will grant you its claws as a secondary reward, even if you fail the mission.
The most important part, in reality, are the preparations (yes, more important than the fight itself, otherwise it is useless to even try to defeat him). The Behemoth is a particular monster compared to those that have appeared so far, for one simple reason: it was created with the aim of maximizing the potential of a team. With this, we intend to clarify that it is appropriate to attempt the mission as a team, possibly with friends with whom to communicate in real time via a voice party.
Basically, your team will have to fill the following roles:
- A team member will need to take care of support first. This can be accomplished by bringing a large supply of items that can heal and buff the party, including Demonic Dust, Hardshell Dust, and Dust of Life. Maybe not everyone knows that it is actually possible to bring more than the maximum amount allowed by the game, and it is possible to do so by bringing the necessary ingredients to create them, so that you can make other Powders on the same spot, without having to return to the camp. This team member must also bring 10 lightning insects, plus 3 pods (we'll find out why later). Finally, it is extremely useful that those who cover this role have a set whose active skills include "Healing Bonus"And"Large Area". He can choose any Dragon or Water weapon, but altered states are fine too. If you opt to stay away from the Behemoth, equip a Hunting Horn to buff, but remember that this weapon is also devastating from an offensive point of view.
- Now let's move on to who will have to make life impossible for the Behemoth, or at least tempt us. The Behemoth is quite vulnerable (2 out of 3 stars) to Poison, Paralysis and Sleep. This party member will need to equip himself for ranged combat, obtaining a bow or crossbow that has a large amount and variety of projectiles with altered states (you can see which weapon will grant you more bullets via the diagram at the Forge). A good armor set for those who cover this role is that of Anjanath, thanks to the Artillery and Marathoner skills, which allows you to move while consuming less stamina. If you manage to set enough jewels, activate the skill "Perfect shape”To do more damage from a distance (technically, although the Behemoth is able to hit even from a long distance, whoever covers this role will be less subject to the attacks of the monster, thanks also to the member who will cover the third role). Another good set for long range fighters is the Teostra.
- The Tank is another role that must not be missing, given the necessary defensive precautions. The Behemoth can target a hunter if he has a particular focus on attacking the monster's two horns. This person must first have a high defense and wield a weapon capable of dampening or parrying enemy attacks (Greatsword, Sword and Shield, Spear and Loaded Blade, for example). A defensive set of the Uragaan could come in handy, both as a Physical Defense and as elemental resistances (guess what? It resists fire and thunder). His skills will also help you out, sort of LV Guard 3 with the complete set. The first member of the team he will have to be very careful when his mate is targeted, as he will have to heal him promptly once the Behemoth focuses only on the member dedicated to Tankare. The Vitality Cloak might give you a little help, but you can be sure that the Behemoth's power will destroy it in 2 attacks, while as a tool in the second slot you could opt for the Stability Cloak, capable of canceling roars, gusts of air and muffling damage, preventing you from spreading out.
- The fourth and final member will have to do the work from behind the scenes, especially when the third is targeted by the Behemoth. Choose the set that seems most suitable for you, bearing in mind that you would do well to equip an insect glaive with Dragon element (that of Xenojiiva, for one thing). Equip the affinity flare as a dedicated tool, to make sure that your shots are almost all critical. If you opt for critical and elemental damage in throttle, a full set of the Blue Rathalos is quite suitable, thanks to the skills dedicated to critics with increased damage, but also for elemental hits. Try to ride the Behemoth at the beginning of the fight, so as to immediately deal massive damage once it collapses, and repeat the procedure every time it changes area. When the Behemoth is focused on the Tank, mercilessly hit the legs and abdomen (as far as you can) to cause massive damage. Be careful not to get involved in the Behemoth attacks if you are very close to whoever has to Tankare.

Having clarified what the roles are, here are a couple more tips on what MUST NOT MISS in this mission:
- All members, regardless of the type of meal eaten in the canteen, must ingest a Demonic Megasiero it's a Megasiero Armor as soon as the mission begins.
- At least one of the 4 members must activate the food skill "Felyne Insurance“, A KO will be rewarded and you can allow yourself the luxury of dying 4 times instead of 3.
- Bring a return ball each, if you do not want to risk everyone dying from the "Eclipse Comet" attack.
- Everyone must have 3 units of: Demonic Dust, Hardshell Dust, Dust of Life, Lightning Pod. The member chosen for the support (which we recall, should have the “Healing Bonus” and “Wide Area” abilities active) will also have to equip himself with 10 units of the 2 ingredients to combine a total of another 10 Dust Of Life.
- Everyone has to bring 10 Flash Bugs to get 10 more Flash Pods than the basic transportable ones.
- The designated Tanker should look for a meal that gives him at least one of the following two abilities: Defender Felyne II(High probability to reduce damage taken) or Cold Blooded Felyne (You are left with 1 HP even if you suffer an attack that would have knocked out the hit player).
- The one designated to rage the Behemoth with elemental damage should have a meal that gives Elemental Attack II, or even III.
After this long guide to preparations, let's finally move on to the actual confrontation.
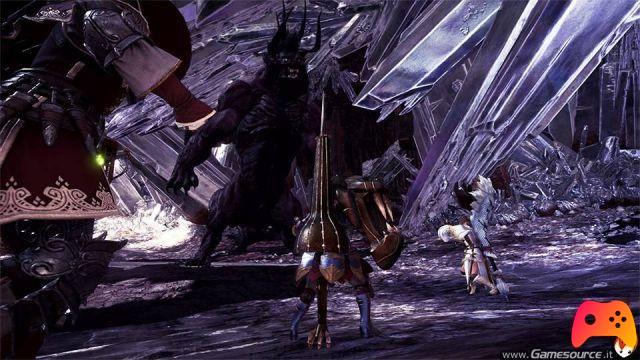
In the first phase of combat you will be in the area where there are the two scalable crystal bridges (perfect for jumping on the backs on monsters) and two rock crystals that you can hit with the explosive crystals that you will find on the ground. The first thing to do is attack it from the bridges or use the jump for those with the insect glaive and ride it. Once the monster is overthrown, hit it in the tail with edged weapons and in the head with impact weapons. After, use the explosive crystals at the right time to collapse the rocks above the Behemoth. If you can hit it with both stalactites, that's a total of 3400 of damage.

In this first phase the Behemoth will not be so scared, it will limit itself to using mostly the single Meteor, some body or tail attacks and, much more rarely, Charybdis. Meteor is easy to dodge, as you will already see the ball of light on the spot where it lands and you just need to air dodge to get out unscathed. Charybdis is an attack that takes time to charge, but if the Behemoth manages to summon it, it's everyone's trouble. Charybdis is a large area tornado that slowly forms at the foot of one of the targeted hunters. You can use the air dodge as soon as the tornado is created, but that doesn't mean that the huge gust of wind will stay in place for quite some time, limiting your mobility zone. You can safely use a Lampo pod to interrupt the summoning of the Behemoth or, if you do not have the opportunity to throw a Lightning Pod in front of the monster's eyes (or worse still, no longer possess any) the targeted player can move as far as possible from the combat area, causing the tornado to appear in an area where it does not in itself cause problems for the group. That said, you can continue the fight until the Behemoth decides to switch areas (aka, you have dealt enough damage) and escape to the ravine area just north of the area you are fighting in. The second phase of the fight will take place there.
In the second phase, you will be greeted by a Charybdis as soon as you enter the area. One of the party should run as hard as he can to the Behemoth's forehead e throw a Lightning Pod at them to prevent the Tornado from summoning. In this area you can make good use of the step that covers a fair amount of the perimeter to jump over the Behemoth and ride it a second time, but the team member with the bug glaive could do it without. The Behemoth will repeatedly use both Meteor and Charybdis, plus it will try to use Thunderbolt. This thunder attack is capable of putting you in shock status, and getting hit more than once could result in paralyzed. The altered state passes quickly, but if you don't want to risk it, bring a couple of Nulbacca to avoid the worst. Do not be fooled by the small electric waves on the ground, they take away almost nothing and above all it is NOT there that the lightning will arrive. However you can use these waves to figure out the timing with which to use an aerial dodge and keep yourself out of trouble. After taking a lot of damage, the Behemoth will cast Comet, even more than once. There Cometa does not take much away, e it actually has invaluable strategic value for the team. When at least a couple of Comets are scattered around the area, do everything to prevent the Behemoth from accidentally destroying them, then move the fight to a distant area. The presence of Comets is also the small omen of the most devastating attack of the Behemoth, able to oneshot all those who end up victim: Eclipse Comet. It has been ascertained from multiple sources that at the moment no defensive combination has been discovered capable of resisting this attack (even wearing the Vitality cloak), the only alternatives to escape certain death are 3:
- Take shelter behind one of the comets cast from the Behemoth. It is the safest option, but you will have to position yourself from the back side of the Behemoth's position.
- If you don't have enough time to run after the Comet, you can choose to flee to an adjacent area of the map if you have it nearby, such as the volcanic zone slightly east of the area you are in at this stage.
- Use a Return Orb to find yourself at the camp. As soon as you arrive, immediately go inside the tent and wait for the attack to end.

That said, if you opt for the third alternative, you can take advantage of it to stock up on Powders, Lightning Pods and possibly another Sphere of Return, so that you know that the Behemoth will use the Eclipse Comet at 100% of all probability at least one more time before it the fight ends.
Once you have survived the Eclipse Comet, the fight will take place in area 14 of the map. You will find that you have reached the penultimate stage of the fight because the fighting music will change, in honor of Final Fantasy XIV.
The third phase is not that different from the second, apart from the fact that the Behemoth may give you less chance of escape from the next Eclipse Comet, as it will cast fewer Comets to take refuge. In this area, now familiar to most of you who have farmed the Nergigante, You can use the different crystal pillars as an opportunity to mount the Behemoth a third time. For the rest, use the same tactics explained in the second phase.
Having survived the second Eclipse Comet, the Behemoth will go to rest in the lair of the Nergigante. Everyone go back to the camp and stock up on Explosive Barrels, Life Powders, Demonic Powders and Hardshell, Lightning Pods. If any of you have been KO'd, make sure they drink a Demonic Megasiero and Armor Megasiero. You can also eat again to activate other abilities if they have disappeared due to a KO. But hurry up, the Behemoth is able to restore some health as it rests in the lair.
Then go to the northern area, to the Nergigante's lair. To be the last phase, paradoxically there is nothing else to add at the tactics level. Buff yourself out and place all the Barrels in the Behemoth's head. After that, the team member with the highest attack, or able to perform a charged attack such as the Greatsword, should deliver a well-aimed blow to the Behemoth's horns and detonate the barrels for massive damage. That said, you survive this last phase and, alas, a possible last Eclipse Comet. If you manage to get this far without reaching 3 KOs (4, if one of the party has activated “Felyne Insurance” by eating at the camp) nothing can stop you from finishing it once and for all and finally collecting the right rewards.
By managing to farm the Behemoth it will be possible, in addition to boasting of having accomplished this feat, to take possession of the Gae Bolg, an Insect Falcione that can become Vera Gae Bolg once upgraded. We're talking about a weapon that has 589 Attack Damage, 240 Dragon Elemental Attack, 10% more Affinity and a 3-space slot to set a jewel.
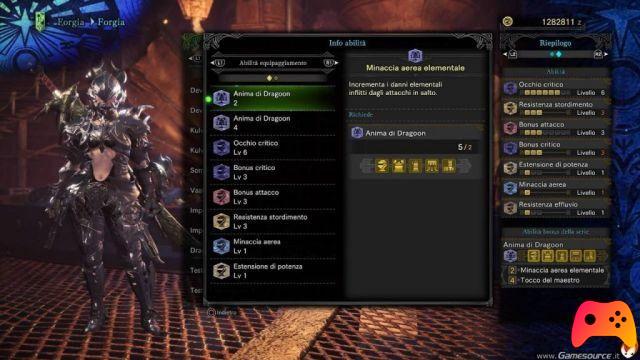
The armor of the Behemoth, Drachen, on the other hand, provides 288 of physical defense, obviously improved with the armor spheres, resistance to Thunder and Dragon at the expense of a vulnerability against Fire, Ice and Water. The armor set provides perfect skills for increasing physical damage, and the damage dealt by critical hits. Great with its insect glaive counterpart, this armor increases the effectiveness of air strikes by 10% and an increase in affinity. The Power Extender skill is for those who equip those weapons that have a type of charge, such as the Long Sword or Double Blades. The ability will extend the time the weapon remains loaded by 10%, allowing you to enjoy the bonuses granted longer.
We are confident that this guide will come in handy and if you don't make it in the first few attempts, don't despair. This collaboration has exposed for the first time a really tough quest even in multiplayer, and will require some dedication, especially if you aspire to do the entire Behemoth set, which will require you to complete the mission multiple times.
► Monster Hunter World is an Adventure-Action game developed and published by Capcom for PC, PlayStation 4 and Xbox One, the video game was released on 26/01/2018
Monster Hunter World is a game to own at all costs: we decided to evaluate it with a 95%, if you are interested in learning more you can read the Monster Hunter World Review