Rebecca introduces herself to the Ecliptic Express. If you continue to your right, towards the back of the train, you will find the door locked, for which you will need a key. So go to the one on the opposite side, entering the compartment of carriage # 3. After a brief animated scene, Rebecca finds herself surrounded by three zombies. Take care of these rotting beings, especially the one in the uniform of a conductor, who has the opportunity to follow you to the other compartments. Once the fight is over, continue to your left and enter carriage # 2. Enter the first bunk, marked with the tag “202” and collect one Ammo box, a file called "Passenger's diary”And, hidden near the bed ladder, a single Inking ribbon. Exit the room and enter the other cabin, marked with the plate “201”. Inside, one Typewriter, will allow you to save your progress so far. Next to it, a complete set consisting of three Inking ribbons it can be added to the single one, found in the other room. In the cabin you will also find a Green grass at the foot of the bunk bed (remember in this chapter that only Rebecca will be able to mix healing herbs, so don't let Billy collect red herbs, filling useless places in your inventory) and another document, called "Investigative orders“, Which will shed some light on why that train is on a railway track not present in the maps. Exit and keep going forward to the end of the carriage. You will see the collapsed body, now lifeless, of a train employee. Examine the corpse to find it is holding one Train key, (Restaurant Car Key) which will unlock the door we noticed at the start of the game. After taking her, a cutscene will start, where Rebecca will meet Billy Coen, a former Marine Lieutenant. While you try to follow Billy, to force him to surrender, a Cerberus will appear, breaking through the windows of the carriage, along with a battered Edward Dewey, your comrade, who will warn you of the presence of strange beings in the forest. Kill the Cerberus, turn the corner to booths “201” and “202” and another one will appear, attempting to attack you. Then approach Edward Dewey's mangled body again, to appropriate his own Bullets. Mindful of the Key of the dining car that you collected a short time ago, retrace your steps towards the end of the train.
Before going to unlock the door in question, however, go up the stairs next to the exit of carriage # 3 and reach the upper level. When you reach the landing, turn your gaze to the right and collect theGreen grass (use if you were injured in the previous dog fight), placed on top of the stool next to the locker. From here, however, you will not be able to continue further, because, scattered along the corridor, the usual drooling substance blocks your passage. Go back down and continue to carriage # 2. Use the Dining car key on the door and then, when prompted, get rid of it. Most certainly, in the passage from one carriage to another, there will be the possibility of encountering undead rising up. After the animated scene, collect the document "Notice to supervisors“, At the foot of these, and continue up the steps. When you reach the semi-burnt room, head towards the back of the carriage, where, seated at a table, there seems to be a survivor. Keep your distance from the creature which, by taking advantage of immense offshoots, can cause you damage even from long distances. Whether you decide to fight it or not, there will still be an animated action scene against the protagonist, by the leeches. After receiving one from your new companion in misfortune Ammo box, Billy will become a playable character, until the end of the adventure. So it's up to you to use one or the other character as the game progresses. I recommend, however, more Billy, because, being equipped with a higher level of stamina, he will adapt well to the clash with the zombies and the BOWs present. At the end of the cutscene, you will discover that someone has taken over the controls of the train, because it has started to march at insane speed. Then continue exploring the convoy. Split up, check the "Game Manual 2", to understand which are the keys that allow the split from the partner. Send Rebecca to the back of the carriage, where there is a window, which overlooks a ladder that leads to the roof of the train. Climb it and continue above, until you reach a huge gap in the ceiling of the car. Examine it and connect the cables, to restore power to the whole carriage, especially the automatic door on the lower level leading to the kitchens.
Rebecca, who you are using, or Billy, if you prefer him, will then fall into the car below, being trapped in a service cabin. Inside, collect theGreen grass, Ammunition for the gun and the Key of the driver of the train. If you approach the door, you will find that something in the lock is preventing it from opening and that you need a pointed tool to unlock it. Search the entire cabin and you will notice a small dumbwaiter on the wall. Call him on your floor and put us in there Driver's key, and then bring it down. At this point go back to using Billy / Rebecca as a character. Direct him down, towards the stairs, but instead of returning to car # 3, head to the kitchens. Now that Rebecca has turned the power back on, the automatic door will open as you pass. As soon as you enter, jump into the narrow corridor on your right, where you will find the dumbwaiter. Inside is the Key of the driver that Rebecca sent you. You can also use the small elevator to swap items or ammunition between character and character. Now Billy, in possession of the Key, will have to go towards the head of the convoy and precisely in carriage # 2. Then cross all the wagons to the destination and arrive at the door of the driver's office. Inside it, a multitude of objects will peek out: one "Train map" hangs on the wall next to the door, a Green grass it's a Red grass are located on the windowsill, in the closet you will find one Carrying case, while a document called "Driver's note " hides on the table, among books and piled up papers. If you read it, you will discover that to access the engine room, you will first have to find the two padlocks to unlock the lock of the driver's briefcase, where the magnetic card is hidden inside. Billy is not able to mix herbs, as previously pointed out to your attention so, also having few slots, it is advisable to simply touch the objects, so that, even if not transported, they can be highlighted on the map and grabbed later. Now tap the button on the wall to bring down a metal ladder. Climb on it and you will emerge in another dining car. Go through the large hall, towards the door on the other side.
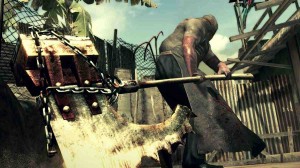
Towards the middle of the car, your attention will be captured by strange noises that seem to come from the roof of the convoy. For now, we'll ignore them and head for the door. Go inside and examine the food trolley on your right. A small one Ice ax lying on one of its shelves, it will be useful to open the lock of the door that keeps poor Rebecca imprisoned. Continue further down the corridor until you reach the cabin marked "101". Inside, you will find a myriad of objects: one First aid spray, a Ammo box, Shotgun cartridges or a Hunting shotgun, leaning against the bed. The latter occupies two places in the inventory so, knowing that a reasonably tough fight awaits you soon, calmly decide what to bring and what to leave. Exit the cabin, but you will again find leeches hindering your path. Then retrace your steps and get ready by equipping your rifle. Walk all the way through the dining car hall to the middle, where a sudden commotion on the roof announces the coming of a new enemy. Keep your back to the door you came from, bring the scorpion closer and repeatedly aim for the head. With each shot fired, the creature will recoil, allowing you to recharge. In fact, the shotgun contains only two shots at a time. With 6 well-aimed hits, the monster should pass away. Once the battle is over, don't forget that the Ice ax it is the tool you have to pass to Rebecca, trapped in a carriage a few meters ahead, so if you haven't brought it with you, go and equip it first now. Among the rubble of the ceiling, destroyed in the blatant entrance of the scorpion, look for thePanel opener. Using the ladder, go back downstairs and head into the kitchen car to send the pointed instrument to Rebecca via the dumbwaiter. As soon as the girl receives it, she can force the lock and exit. A pair of zombies will be waiting for you outside the door. If you don't have any ammo with you, flee down the stairs. When Rebecca has reached the lower floor, have her march towards Billy, so that the couple reunites and can collaborate in the following missions.
Head to the back of the kitchen and, with thePanel opener, pry up on the floor hatch, which will reveal an opening. Enter the narrow passage and continue to the cargo carriage. As soon as you exit the shaft, you will find Cerberus, take them out. In the shelves of the wagon there are Shotgun cartridges it's one First aid spray. There is also one Can of kerosene and, towards the exit door, inside a dog cage, you will find a Gold ring. Then continue outside. You will notice that on the sides of the door, there are two different mechanisms, highlighted by red lights. Of one, the one on the right, we will be interested later, while the one on the left, we will immediately focus. In fact, a grapple is placed on the arms that protrude from the wall, but to retrieve it we should first deactivate its stops. Keeping the two characters separate, place one in front of the lever and the other in front of the Grapple, placed on the wall. Have one unlock the device and immediately take possession of the other character by retrieving the tool. This item takes up two spaces in your inventory, so use the one with the fewest items below, or at least two free spaces. Retrieved this important object, reunite the couple and proceed towards the kitchens, this time through the door, which you will now be able to unlock since the lock is on this side. Eliminate the enemy you will find on your way, examine the fridge where it came out, you will find a set consisting of 3 empty bottles. Combine them with the Can of kerosene.
Exit the kitchens and cross the carriages backwards to carriage # 3. You will notice an open window on your left. Eliminate the crowd of zombies with utmost caution and with well-aimed blows. When the carriage is clear, divide the group and decide who to send to the roof of the convoy. Billy is always suggested for the strong stamina he possesses. But in this case you can also use Rebecca, since you will only meet a zombie on the upper floors, while here there is a possibility that she will get up more than someone else. While then Billy will be waiting for you downstairs, send Rebecca outside, with the help of the grappling hook. Make it trudge on the roof, made slippery by bad weather, and enter the gash that opens in the ceiling of the cabin marked with the number "102". Kill the zombie, examine the closet and pick up a Jewel case. Open it to collect a Silver ring. In the cabin there is also a Knife. Touch it, to make it stay among the objects that are saved from the derailment. After the cutscene, head back downstairs and rejoin Billy. Join the two Gold and silver rings, or separately, insert them in the Carrying case. The combination will allow it to open and you will get the Blue card. Use it on the magnetic card reader, which is located in the carriage at the head of the convoy.
After the cutscene, head to the engine room, ignore the bodies of Delta Umbrella team, scattered in the corridor, and enter the pilot's cabin. However, one character must remain in the cabin to activate the devices after the other has entered the activation code. Take the Magnetic card and the two Ammo boxes and give them to the character who will have to go back through the carriages. After getting rid of all the zombies, head to the back of the train, where you grabbed the grappling hook. On the side wall there is a card reader. Insert yours and, depending on the code that comes out, press ten keys that give the sum of the code number. The latter is random, but there are only three possible combinations: "36", "67" e "81". For the "36" press the number "3" nine times and then type "9"; for "67" enter the number "7" nine times and then enter the number "4"; for the "81" click the number "8" nine times and then enter the "9". When the digits of the correct combination are entered, Rebecca (or Billy) will also have to enter her combination, in the control room. This, always casual, can be "42","53"Or"67". To get the "42": the number 4 nine times and then the "6"; for the number "53" enter the number "5" nine times and then add the "8"; for the "67" click the "7" nine times and then add the "4". If the number series is correct, you will see an animated scene. After the derailment, it will be possible to recover all objects touched during the stage on the train. By clicking on the map, you will have a clear view of where they were thrown. On the contrary, there will be no way to recover the neglected ones. You will now also find all the zombies that you had avoided eliminating on the convoy. Killed the zombies, go out and past the corridor with the sewer drain, go up the ladder.