CAUTION: in The Walking Dead the choices made will lead to alterations in the plot and events presented in the following chapters of the game. So pay attention to any key choices - in our solution indicated in bold - that will allow you to continue the adventure by saving or condemning some of the characters in your group to certain death: choose carefully!
Chapter 1: the cop's car
In the car, look in the rearview mirror and talk to the policeman until the moment of the accident. Once you have recovered, kick the windshield to get out of the car and examine the policeman's body. Remove the keys from his belt and use them to open the handcuffs. When the cop wakes up, pick up the shotgun and ammo - the latter are to be picked up twice, as Lee will understandably be stressed and knock them down - load up the rifle and shoot the zombie cop in the head to save you.
Chapter 2: Clementine's house
Once you have escaped the zombies in the forest by climbing the other side of the dirt road, go to the back door and open it. Go over the kitchen to the phone, and listen to the messages on the answering machine. Then examine the pantry in the kitchen until you find the walkie-talkie. At this point you will be attacked by the babysitter, transformed into a zombie: hit her until she kills her. Go back outside and look at Clementine, to be attacked by the babysitter again. Clem will pass you a hammer at this point, with which you will hit the zombie in the head to get rid of it for good.
KEY CHOICE: choose, together with Clementine, if you want to leave during the day or at night.
DAY: exit the entrance gate and continue until you meet Shawn and Chet, to whom you will have to tell the truth when the choice is proposed to you. Then select the car and push it repeatedly to move it and escape from the zombies that will attack you.
NIGHT: Exit the entrance gate to meet Shawn and the assistant sheriff. Talk to them to take you directly to Hershel's farm.
Chapter 3: Hershel's farm
Talk to Hershel Greene and then, in the barn, talk to Clementine. In the morning you will meet Kenny and his son Duck. Near the truck talk to Kenny, who will reveal his plans: he will explain how he intends to reach the sea and escape from the zombies using a boat. On the porch, chat with Clementine to find out more about her past, then talk to Katjaa - Kenny's wife - for news about her and her family. Finally, near the fence, cut wood with Shawn and the boy will tell you about himself.
KEY CHOICE 1: Go back to the barn and choose whether or not to tell the truth to Hershel. It will be difficult for you not to lie to the man's questions, but the game will remember if you tell the truth.
KEY CHOICE 2: When the zombies attack, you'll have to choose whether to help Duck or Shawn. Keep in mind that Shawn will die anyway, so if you choose to help him Duck will die, compromising your with Kenny for the rest of the adventure. Our advice is therefore to save Duck. The dialogues that follow will be irrelevant to the adventure, since however it is Kenny will offer you a ride up to Macon.
Chapter 4: Everett's Pharmacy
Just watch the introduction to meet Lilly, Larry, Doug, Carley and Glenn.
KEY CHOICE: In the dialogues that follow, you can decide whether to agree with Kenny's ideas or those of the group of characters you just met, thus influencing your with Duck's father.
The zombie that comes out of the bathroom will quickly attack Clementine, be ready to select the girl to save her. After this scene, wander around the room and pick up the energy bars: there is one just after Kenny's family and another - continuing counterclockwise in the room - after Larry and Lilly, If Duck is alive, give him a bar. and Kenny will see you, regaining faith in you in case you have decided in previous conversations not to agree with him. To find out what happened to the owners of the pharmacy, talk to Lilly, then examine the radio that Carley is trying to operate without success. Turn the radio and open the battery door to discover that it is without batteries: you will find one behind the greeting card stand and another on the floor. Go back to Carley with the batteries, and insert them with the correct polarity to make the radio work. Now enter the next room, the one labeled "Employees Only". Move the pallet and small desk blocking the entrance to the adjacent office. At this point Clementine will injure her finger: use the red first aid kit on the shelf to medicate her.
Now examine the photograph on the floor and, immediately after, talk to Carley. Examine the television above the shelf where you found the first aid kit earlier, then examine the drawers near Clementine to find and collect the remote control (you won't need it now as the television doesn't work, but you will use it later in an hour). other area). At this point, head back to the main room, where you will have another conversation with Glenn and Carley.
Chapter 5: the Motel
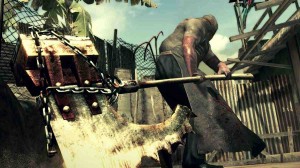
Pick up the pillow, then aim the camera to the right and run behind the truck. Nearby there will be a zombie next to a car: kill it using the pillow first, so as to muffle the sound of the shot and not let the other zombies nearby notice your presence. Open the car door and collect the candle, which you can use against the truck window to collect the ice pick. Now go back to the starting point, behind the wall and near the motel sign, to use the ice pick on the nearby zombie and kill this too without making too much noise. You can then use the ice pick against a second zombie, which this time you'll need to hit twice in the face before it dies. Finally, the ice pick will come in handy a third time against the zombie imprisoned near the ax: kill it and pick up the weapon. Now approach the other zombies until they notice your presence and walk towards you: wait for the right moment and use the ax to get rid of them, then you will find yourself faced with a choice.
KEY CHOICE: You won't be able to save the woman, who will die anyway, but whether or not you allow her to use your gun will affect your (respectively) with Glenn or Carley.
Chapter 6: the keys
Once back at the pharmacy, talk to Doug to go up outside. Before continuing you will have to examine Lee's brother, who died in the middle of the road and with the keys you need to continue, the brick in the ground and the padlock with the combination that blocks the grate behind which you shelter. Also examine the televisions inside the window to your left and, after you have verified that it works by trying it for yourself, give the remote previously collected to Doug so that he can use it later. Now, in order: break the lock with the ax, open the door and pick up the brick, to throw it at the TV showcase: then join Lee's brother, and get ready to hit him with the ax a couple of times to to be able to free the keys. Now go back inside the pharmacy and use the keys to open the office found previously (you will realize at this point that the keys were not necessary to enter the office and that the ax would have been enough to break the door, but by now the risk has passed). At this point an alarm will be triggered, to be stopped by breaking it with the ax or with good manners, using the keys in your possession again.
Chapter 7: escape
Hold the door tight and help the other characters avoid the zombie invasion.
KEY CHOICE: You will have to choose whether to let Doug or Carley hold the door. Whoever you leave will be killed, while the other character will survive and continue the adventure with you.
Help Clementine escape from the zombies and run to the door. Hold on to Kenny's hand to end the chapter.
Epilogue: back to the motel
You have come to the conclusion of the first episode of The Walking Dead. Talk to all the characters present at the motel to finish the epilogue and get ready for the second episode, "Starved for Help".