The following Bioshock walkthrough will guide you through your Rapture adventure by following the PlayStation 3 version released a year after the PC and Xbox360 versions.
It is the year 1960. You are quietly flying over the Atlantic when something goes wrong: the plane crashes and you survive by a miracle. Return to the surface just before suffocating and, after catching your breath, look around you and notice a large lighthouse in the middle of the ocean. What the heck is a lighthouse doing right in the middle of the ocean? Swimming you reach the lighthouse and, climbing the staircase, you find yourself in front of a door ajar. Come in. The door closes behind you and a few moments later lights come on to show you the inside: you find yourself in front of a large bust of a man with a banner in front that says: “Neither gods, nor kings. Only men". Go down the staircase with the lights that come on as you pass and at the end of this you will find a bathysphere. Doubtful and frightened, enter and pull the operating lever ... towards an underwater city, once rich and happy, an Eden, now a place populated by mad citizens who kill each other, where reason no longer exists. Let the adventure begin.
WELCOME TO RAPTURE
After watching the murder of a man without being able to move a finger, take the radio from the bathysphere. Exit and head left: to your right is the so-called "chamber of life" from which you can regenerate or not depending on what you have chosen in the game options. Then go on, take the wrench that is in front of the rubble and use it to destroy them. Avoid the fiery mobile that will fall on you, then go ahead and eliminate the splicer: the winning tactic to avoid as much damage as possible is to circumvent its attacks and hit it in multiple points; then rummage in the corpse and you will find an eve kit and a medical kit. You will not be able to continue until you take the plasmid of the electric discharge from the Gatherer's Garden, or the distributor of plasmids: you can find it in front of you climbing the stairs. You will lose consciousness falling from the upper floor and after an interlude you can get up and continue: first, however, eat everything you find around to restore the health you may have lost previously. Pulling an electric discharge on the out of order lever will open the door and you can move on. After passing the corridor torn by a piece of the plane's fuselage, you will arrive in a safe and dry room. Rummaging around you will find medical kits, eve and a bottle of Merlot Arcadia: alcohol increases health and decreases eve while cigarettes the exact opposite: so be careful to use them, in this case you will lose eve even though life is already at most. Suddenly two splicers will arrive in the room and, as Atlas says, the winning tactic is "a nice one two": paralyze them with the electric discharge and finish them with the wrench. Head up the stairs and kill the fiery splicer - he'll charred to die on his own anyway. Continue into the room that will fill with water and immediately take the elevator, you will not find anything, however. Once you reach your destination, kill the mad mother, take the gun from the cradle and the kit from the corpse. Enter the Night, go down and kill the splicer who knocks in front of the kitchen door, at this point another splice will come out of the kitchen, kill him. Enter the kitchen and rummage around choosing whether or not to take alcohol and cigarettes. When you leave, you will find three recombinants in the flooded ballroom: just throw an electric discharge into the water to send them to the creator. By rummaging you will find, in addition to the usual things, an ACCU-VOX recorder: you can hear the experiences and stories of the inhabitants of Rapture by picking them up and listening to them: you will find many of them around, so keep your eyes open. So go up, kill the last splicer, turn right with respect to the stairs, and enter the bathroom on the right where you will have an optical vision and continue to the end. At this point a door will open behind you from where a splicer will come out, after killing him, enter the other bathroom and go through the hole in the wall: you will meet a little sister and a Big Daddy who will kill a splicer who was threatening the small and will serve you kindly on the window. At this point, just use the wrench to blow the lock of the gate on your right. Then enter the theater and rummage in the two corpses. Go ahead and kill the splicers in front of you. Go down the stairs and search for the dead Big Daddy. At this point, while you are heading towards Neptune's Bounty, the alarm will go off and a good number of enemies will arrive: the best tactic is to wait for them to jump down the slashed stairs to electrocute them while they are in the water.
MEDICAL PAVILION
Exit the pressurized room, enter the lounge, turn left and search the area for medkits and the like. You will find a Circus Value distributor that you cannot get around but that will provide you with another ACCU-VOX and nothing else useful. Go up the stairs. At the end you will have to use the emergency passage to continue: the door will be blocked by a security robot. Get around it: just solve a simple "puzzle" which consists in dragging the right elements to the right place to ensure that the tube reaches the other outlet; all this while the water flows, do not worry, however, it is very simple from the beginning. When you pass the door you will have the security robot who will be your trusted ally. Have him follow you through the door and then hide behind the column to see him engage in a battle against the two Splicers who are slaughtering each other. Check their bodies and then go up the stairs and use the panel button to open the door behind you.
To use the emergency passage you will need to take the key from Dr. Steinman located in the Medical Pavilion. Go to the nearby corridor and then immediately left to find a machine gun. Unfortunately, you don't have a lot of ammo, so you'll have to stick with the gun. Press the button you will find to restore power to this area of the Medical Pavilion. A large number of splicers will start coming towards you. After eliminating them all, enter the Medical Pavilion and then the Surgery, where Steinmann is staying. Disable the turrets using electrocution and then bypass. Try to get the enemies into their shooting range so as to save fatigue and ammo. There are a large number of enemies in the area, including a nitro splicer that will throw grenades at you. Ignore the branching passages here and go straight through the surgery entrance. When you get there, Steinman will block your passage by collapsing a sign that will block the passage. In order to continue, you will need to find the Telekinesis plasmid. Before you do that though, you'll have to find a way to melt the ice that prevents it from blocking access to different play areas. Enter the Eternal Flame, the cremation department, where you will find the incineration plasmid that will allow you to set everything on fire. Continue after eliminating the sheet of ice that obstructs the passage and pick up the shotgun, pay attention to the splicers that will attack you in the dark: the best tactic is to always move back and forth waiting for them to emerge from the darkness to hit them immediately, so you will avoid at best to be impressed. After killing them all then enter the Dandy Dental: here you will find the telekinesis plasmid and you will have to replace it with one of the ones you already have. Go back to the entrance of the surgery and using the telekinesis stop the grenade that is thrown at you from a balcony and redirect it into the barricade that blocks your path to the surgery. When you face Steinmann, he will be armed with a machine gun: the best tactic is to bypass the health station that Steinmann goes to whenever his health is at critical levels; by doing so not only will it not be cured but will also be damaged. At the end of the fight, recover the key for emergency access from the corpse. An ACCU-VOX can be found on the corpse lying on the operating table and as regards the medical kits in the safe and in the drawers of the clinic. The passage of the Medical Pavilion is destroyed and you must therefore look for a detour. Then you will find a little sister whose Big Daddy was killed: you will have to decide whether to save her or not. By killing her you will receive much more Adam while leaving her alive you will receive half of it but you will have advantages later and above all you will have the conscience in place. Continuing you will find yourself in front of a Big Daddy and you can decide whether to leave him alone or attack him. You will need all the anti-armor and electric ammo to take him out; fire also has its effect on him. Once the Big Daddy is dead, kill or save the little sister and then return to the emergency passage.
NEPTUNE'S BOUNTY
Cross the pier and after eliminating all the splicers, defeat the first Big Daddy that you will face: the winning tactic is to get around the machine guns that are under the pier and attack it, then lure it into the entrance you did not pass previously and use both gas cylinders and telekinesis to knock him out. By saving your little sister again, you will receive a prize that you will find near the next gene bank. At this point you will find yourself in front of a missile turret: I advise you to go around it even if you can very well use telekinesis to send the missiles back to it. When you are in front of the missile turret go through the door just behind to get to the next objective. You will meet Peach Wilkins in the fish factory and engage in a fight with a powerful splicer spider that will end in his escape. Peach will ask you to find the spider splicer research camera. Once this is done it will open the door for you to pass and continue. Then go back to the upper level of the building and you will find a new passage to the area of the boss's office. The office is full of turrets and cameras, so the best solution is to get around everything that comes within range. As you advance into the office you will find the camera, so take a photo of the splicing spider on the other side of the window. You can take photos of almost any enemy to gain extra damage for the photographed enemy, but for now your goal is to find and take photos of two other spider splicers. Go through the destroyed security window and get out of there. Go to the Mcdonagh Bar with your camera ready: a splicing spider will come at you as soon as you open the door in front of you. There will also be a splice spider inside the Jet Postal but seeing you it will run away and you will have to hack the vault and then use the security robot to take it out.
Before you go to the back room of the bar go up the stairs and search the rooms that are here for more supplies. As soon as you enter room 5 a splicing spider will appear behind you and you can then photograph it. At this point you are good to go with the photos. Go back to the Fish Factory and talk to Peach Wilkins again. Peach will let you pass by asking you to hand over the weapons and put them in the pneumatic tube, then she will try to kill you and you will have no weapons with which to defend yourself except the plasmids and being able to bypass the security systems. Move right where you will find a security camera, then go around it to get the security robot that will help you during the fight. Grab the bombs that Peach throws at you and throw them back at him so that he can be easily eliminated. When you kill him, explore the area and melt any ice blocks you find to get more supplies. Go through the now open door on the north side of the room and retrieve your weapons from the pneumatic tube. Then proceed towards the lair. Destroy or go around the surveillance machine gun then, found the dock, go left, lower and continue breaking the lock with a wrench. Before hitting the switch, sabotage the health station on the left just ahead and save. Flick the switch and all hell will break out. Making your way through the splicers, run away.
ARCADIA & FARMER MARKET
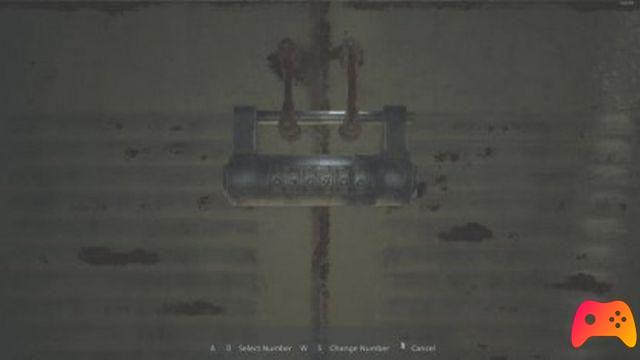
Here you will start to collect the ingredients that you will need later: look in every place then and pay attention to secret passages and apparently inaccessible places ... First, cross the Tea Garden area, here you will meet a new species of recombinants called Houdini, with the ability to vaporize and reappear in other places (usually behind you) to attack you. Continue towards Arcadia Glens and continue towards Rolling Hills. Reaching Dr. Langford's research lab, who will ask you to retrieve a particular species of rose. Some previously inaccessible areas are now reachable, for example the Tree Farm and Waterfall Grotto, in this you will find what you need. Collect it and return to the laboratory. You will pass the rose by pneumatic mail to the doctor and just before entering her room, Andrew Ryan will close it by killing the doctor with lethal gas. Enter the laboratory and use the code (9457) you just learned to open the safe: you will find the diary will give you the recipe to create the Lazarus Vector and the key to the doors that lead to the Farmer Market. Get the chemical weapon on the table. Start making your way out of the Laboratory and proceed through the Tree Farm and you will find the passage that will lead you to the Farmer Market. You will find the first enzyme sample by rummaging through the corpse in front of you. Explore the length and breadth of the area, eliminate any recombined and examine the body, do not neglect the containers scattered around the area. When you arrive at beekeeping, use the smoke dispensers to get rid of the insects and throw yourself into the search for ingredients, pay attention since the time in which you can examine the various containers is very short and the enemies will not be lacking. . When you have enough chlorophyll, distilled water and enzymes, you can create the Lazarus Vector using any U-Invent machine you find. As soon as you've done that, go back to the labs. As soon as you arrive enter the office above and insert the Lazarus Carrier into the car behind the window. Thus will begin the regeneration process of the world's Biosphere. Unfortunately Ryan will not agree and will send against you a large number of spacers: use all the ammunition you need and do not try to spare it; get ready for the third enemy wave and when it arrives you will have to use the proximity mines waiting for the door to the office to reopen. Finally, rush into the office and press the button to disperse the Lazarus Vector, which will bring the trees of the hill back to life. Now head to the station and then go to Fort Frolic.
FORT FROLIC
Head in the direction of the bathysphere which will lead you to Hephasteus. The passage will be blocked and you will have to go back and turn left towards the theater.
Most of the doors and passages will be locked and you will find yourself forced to enter a large theater; here you will photograph the dead pianist, to the delight of Cohen and his work. The photo taken in fact, as well as for those you will take shortly here, will be placed in Cohen's work, which you will find at the entrance to the theater. Here you will be attacked by spider recombinants: I advise you to photograph them to complete the search. Now go up to the upper floors and then take the elevator. Enter the exhibition hall and wait for the pianist to blow up with the piano or kill him yourself. Take a picture of the corpse and place it in Cohen's artwork.
Cohen will then order you to kill Martin Finnegan, Silas Cobb and Hector Rodriguez. One can be found in the refrigerated area, the other in the record store and finally Rodriguez in the Garden Store; it is not possible to say where it is exactly as it will escape from you and you will have to chase it: the easiest way to kill it is to use fragmentation grenades. For each of them you will have to take a picture after they are dead and place it in the frames provided in Cohen's work. For each photo Cohen will give you a prize: already with that of the pianist you will receive a crossbow. Having completed this assignment, Cohen will show up in the flesh and you can decide whether to kill him or not. Finally go get the bathysphere for Hephasteus which will now be reachable.
HEPHASTEUS
Advance through the tunnels you will find and finally you will arrive in Andrew Ryan's vestibule who will take you directly to his office. Be sure to check all the corpses hanging in the vestibule, one of them will have an ACCU-VOX which will give you information on the next target, which is to overload the Core. This will unlock the electromagnetic lock that locks Ryan's office door. Then go to the Hephaesteus Core where there will now be three exits: one door to the geothermal control, one to the workshops and one to the monitoring zone for heat loss. Take the latter. In the monitoring room you can find the diary with the code of the Kyburz door: it will be on the ground in the upper level, so you will understand that the code to open the door of the Kybutz workshop will be the Australian national day. Look for everything that will be useful here before returning to the Core and going to the workshop. After exploring the upper level of this, proceed down the stairs and around the two turrets. Kybutz's workshop is located immediately behind; go and enter the code. Press the button on the side of the table to open the nearby safe, you will find nitroglycerin inside.
In the southeast corner of the lower level you can find another passage that leads to a secret research lab. Pick up the ACCU-VOX which will tell you the missing components for the EMP Bomb which is on the table nearby. You already have nitroglycerin, all you need is a can of ionic gel and four R-34 circuits. You can find an R-34 by rummaging through the Big Daddy's corpse outside the secret research lab. You will also find a bottle of ionic gel on one of the tables on the upper level of the workshop. Return to Hephaestus Core now to find another ion gel between the two workstations in the highest level of the Core. There will be the body of another Big Daddy in the passage leading to Andrew Ryan's office so you are already two. At this point you just need to kill two other Big Daddies to get the necessary components. As soon as you have everything, go back to the secret research laboratory and complete the bomb. At this point, head to the geothermal control area where you will have to turn the heavy knob that regulates the lava outlet to redirect the flow. In doing this you will be constantly interrupted by the attacks of the splicers: it is good that you do not turn the whole knob together without paying attention to the enemies, in the end you will risk finding yourself in serious difficulty. At this point the magma will have freed from the water the lowest level you can go down. Then raise the platform to the top and place the EMP bomb in the Core to overload it. You can now enter Andrew Ryan's office.
RAPTURE CENTRAL CONTROL
Go upstairs and use the tunnel on the left to get to Ryan's Office. Exit the tunnel by making yourself fall. At the end you will have to insert the key to stop the self-destruct process and escape following by going back and following the little sister to the air duct.
OLYMPUS HEIGHTS
Leaving the Tanenbaum refuge you will find yourself in the sewers. To open the door look for the crank, put it back in its place and turn: then go forward. This direction will take you to the Athena Glory: after you have cleared the Fontaine facility it will continuously reduce your energy. Go to the place marked on the map and find the objective sign for Suchong's location. It will be on the West side of the ground floor here. After the revelations you will have to go on to save your life. Go to the stairwell and start climbing. On the third floor you will come to the balcony, then follow the passage to the northwest corner, making sure to take the ACCU-VOX along the way which reveals the code for the elevator to the Fontaine suite (5744). When you arrive at the Tenenbaum's apartment, explore the upper floor: you will find that the antidote has been moved to Fontaine's suite. Go back to the ground floor and enter the code to activate the elevator.
Take the north door and go up the stairs to find the small room on the side of Fontaine's bedroom where you will find the antidote. To heal yourself completely, however, you'll need to find a second dose of antidote that you'll find in Dr. Suchong's laboratory in Apollo Square. When you are ready to continue, find the Apollo Square exit, backtracking into the tram system.
APOLLO SQUARE
Go to the street of the tram paying attention to the Big Daddy, continue through Apollo Square and you will arrive at the Artemis Suites where, on the second floor, is the Suchong Laboratory. Open the door and you will find the second dose of antidote. Before leaving for Point Prometheus, visit the Fontaine center for the poor in Hestia Chambers: it is located south of the Rapture Metro. As soon as you are ready, take the bathysphere which will take you to Point Prometheus.
POINT PROMETHEUS
Chase Fontaine until he blows up a door, blocking your passage. To open the other door and continue you will need a little sister. Climb up and retrieve the suit switch from the corpse of a Big Daddy to your right. Go to Little Wonder to look for pheromones: one can be found in room 5, on the ground floor, one in room 7, reachable only from the second floor, and finally the last in the autopsy room. continue to Fallsate Armored Escorts for the suit pieces. After collecting the helmet and overalls, go to the Mendel Memorial Library for the boots. The voice modulator is at Optimized Eugenics, precisely in the Live Subject Testing. Now that you have become a big daddy, go back to the door through which Fontaine escaped and knock hard with the wrench on the door itself or on the nearby pipe: a matter of little and a little sister will arrive.
PROVING GROUNDS
Here you will have to protect the child at all costs. Against the splicers the best method is to use the flamethrower while for the big daddy the rocket launcher, of course. At the end of the level take the syringe of the little sister and, before taking the elevator, see to refuel complete with ammunition and various kits: you will need them.
FINAL CLASH
Go immediately to Fontaine and aspirate him with the syringe the first quantity of adam: it will free itself and you will have to exhaust its energy to lead it back into the generator and then be able to take another dose of adam. You have to be quick to return to suck the adam, because it certainly won't wait for you to disconnect from the generator. Attack him with any weapon at your disposal: some weapons and plasmids are more effective than others depending on his transformation (when his transformation is ice it is advisable to use the fire plasmid for example). Pay attention to the help that the little sisters send you and immediately bypass the security robots that attack you: one less hassle and one more help since they will distract our enemy.