Part One: The Search for Stolen Books
ECCLESIA
Hidden objects: Track N ° 1, Track N ° 5
Glyphs: Confodere (sword)
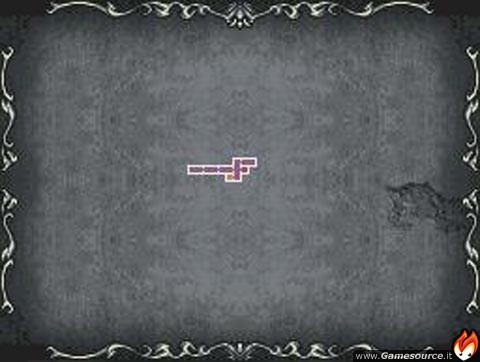
We will start the game by playing the role of a woman, Shanoa, who argues with Albus, a companion of the Order of Ecclesia, an organization born to destroy Dracula. After the discussion between the two, we go up the platforms to the door on the right (the only one accessible for now) and we will meet a new character, the head of the Organization, Barlowe. Here Barlowe will try, through a magical practice, to insert Dominus, the ultimate weapon to destroy Dracula, but Albus, corrupted by envy, will steal the three parts of Dominus. We will faint. In the next scene we understand that we have lost all memories due to the abrupt termination of the ceremonial, so Barlowe will tutor us on the functions of the keys and glyphs. We follow all the orders that will be given to us, at the end of the tutorial we will be free to turn to Ecclesia. Let's go back to the beginning of the game, go up the platforms and go to the top left one, press DOWN and a hidden chest will appear containing Track N ° 1. Now let's go to the leftmost room of the map, in the middle we will find a red chest with a Record N ° 5. We finish exploring Ecclesia until we have the map at 100%, and then we go out towards the Monastery.
MONASTERY
Caskets: Relax, HP Max Up, Book of Spirits (Relic), Heart Max Up, Super Tonic, MP Max Up, Arthro Medal, Antivenin, Cotton Fiber, Magic Ticket, Meat, Chamomile, Lapis Lazuli
Glyphs: Magnes (magnetic force, support glyph), Secare (sword), Culter (throwing daggers)
Villagers: Cat
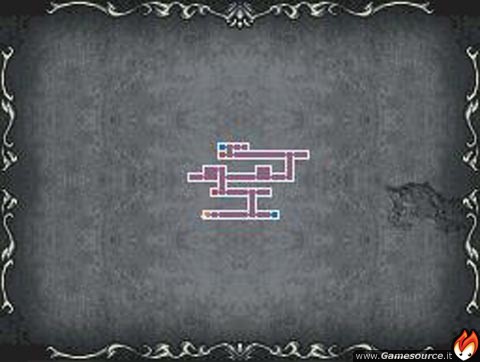
We enter the monastery by going to the right. In the first hall we will find some Skeletons, let's destroy them, continuing we will arrive in a vertical room, go up the platforms, take the chest and watch out for the bats. Pick up the treasure and follow right to another room with a skeleton and 2 zombies, again to the right you will find the teleport room. We go back to the vertical room, go up and go to the right, here are 2 skeletons and 2 banshees, open the red chest and go back. On the left, 4 more skeletons will be waiting for us, continue to a new vertical room where we will find the first support glyph, Magnes! Follow all the explanations and go left for a save point. In the vertical room use Magnes and go up to the end, take the red chest and then left. You will hear a cat meow and you will see a red chest overhead. Let's go and save the cat, let's leave the casket alone, we can't do anything for now! The cat is located in the southeast, below. To reach it, and to reach the chest, you have to duck down and press B to make a slide; I took the cat and the chest and continue to the left, to find a room with an armored skeleton. This enemy, by chance, leaves the Glyph Secare (sword) upon his death, more powerful than the one he still has, but don't equip it, after you will have better! You will also find a block wall, for now nothing can be done. Let's go back up to the vertical room and go right in the middle of the room. Here, in the center of the zombie-infested room, you will find a statue, which broken will give you the Culter Glyph (throwing daggers); equip 2 now, one of the best Glyphs around for a while! Continue to the right to another haunted room; take the golden chest in the center, go up and go left, hit the left wall until it collapses and you will find a secret room with a Heart max Up, go back to the main room and go northeast for a chest and southeast to move on to the next one room. Here are 2 Bashee and an armored skeleton, continue to the vertical room. Go up and go right first, take the chest and then go left, into a room full of zombies, go through it and you will find a new vertical room. The lower left room is a rescue, the upper left a teleporter and the upper right is the Boss. First save and when you feel ready go to the Boss.
Boss: Anthroverta (700HP)
This bug will use 3 attacks: Roll, Web, and Chela.
Use Culter and hit him pretty good, when you see he is about to spin, use Magnes with the left hand grip and stay there until he stops. If he uses the claw, go all the way to the left and he won't hit you, for the canvas just avoid it. Simple!
Defeated will appear a chest with a medal and a red orb that will restore you to health.
Advance and you will find yourself again in front of Albus, after the dialogue exit the monastery and head towards the Village.
WYGOL VILLAGE
Caskets: Coffee, Meat, Milk
Glyphs: Torpor (used to unlock villagers from suspended state)
Villagers: Nikolai
Arriving at the village we will see a inhabitant inside an amber stele and above it a glyph, absorb it. Besides him we will not find anyone in the village, it will populate every time we free a villager from the crystals in the different game levels, explore the city and get the items, then we head towards the forest indicated by Nikolai.
RUVAS FOREST
Caskets: Anti-poison, Cotton Fiber, Magic Ticket, Meat, Chamomile, Super Tonic, Lapis Lazuli
Glyphs: Macir (hammer), Fidelis Caries (summons Zombie, support glyph), Ax
Villagers: nobody
The forest is made up of only 3 long, flat spaces. In the first one you will find a kind of flying octopus, take it out before it takes you! Then you will find a statue, break it and you will find the Macir Glyph, but for now keep holding the daggers. When you find the Necromancer don't kill him right away, wait for him to draw the Glyph, absorb it and then kill him. The Glyph that you can absorb, Fidelis Caries, is a support Glyph that will allow you to summon a Zombie who will follow you and also take the damage for you; frankly I find it useless, as it is very slow. In the next space there is a chest and ax armor, defeats will give you the third glyph of the area, Ax, very powerful, but you will need it later, for now continue with the daggers. In the last area you will find all the enemies encountered so far, slaughter them and exit.
KALIDUS CANAL
Objects: Magic Ticket, Twinbee
Glyphs: nobody
Villagers: Jacobs
Go ahead to the right until you find Jacobs, absorb the glyph and save him. Continue to the right and save. Leaving the save room, and entering the new area with the water, try to break, with the Ax Glyph, the rock at the top left, you will find a bonus object called Twinbee. Continue to the right until you exit the canal. I recommend using the Glyph of the Ax throughout the level.
MINERAL PRISON ISLAND
Caskets: Skeleton Medal, 500 Coins, Cabriolet, MP Max Up, Priestess Ring, Anti-Poison, HP Max Up, Konami Hero, Heart Max Up, Force Ring, Glyph Holder, Chamomile, Cotton Fiber, Magic Ticket, Sage, Copper Mineral, Lapis Lazuli, Leather Armor, Ring of Protection
Glyphs: Hasta (spear), Arcus (bow), Odio Dominus, Falcis (scythe), Vol Fulgur (electric attack)
Villagers: Abram, Cat
Enter and in the next room you will find a teleporter. Go ahead and you will immediately find the boss of this level.
Boss: Schelegante (800HP)
The giant skeleton will use 3 attacks: Punch, Kick and Back Run. Here, too, you can take advantage of three handles for the Glyph Magnes, so use them! As weapons equip the Ax Glyph. Grab with Magnes and throw Ax, grab another handhold with Magnes and use Ax. If you are on the left of the screen he will only use the Punch and the Kick, try to avoid them because they hurt, if you are on the right he will walk backwards hitting you repeatedly. So on the left you can also use the union of the Ax Glyphs, while when you are on the right use Magnes and escape to the left.
Destroyed this pile of bones, continue to the right. You will see several enemies and a moving circle of light, if you get caught by the light an Evil Force (a flying red head) will appear which could give you a hard time, so be careful! After this room, you will find yourself in a vertical passage; at the top there will be a save, at the bottom right the door to continue the exploration. Here you will find enemies with a spear (from which you can absorb the Hasta Glyph) and enemies with a bow (from which you can get the Arcus Glyph), enter and exit the room until you have Arcus and then equip him. Go back to the vertical room and go right to find a room equal to the last one, pass it. You will arrive in a new vertical room, go about halfway, where there is a candlestick, and break the wall for a secret room, continue down. At the bottom, go right and continue to the next vertical room. You will see an Ax Warrior, kill him and go up to the upper room for a chest. For now, get off, you can't do anything else. At the lowest point of the room go left, where you will meet the Invisible Man, be careful! At the bottom left, go downstairs through the wood, on the left you will find a teleporter, then go right. Avoid the blades that descend from above and in the next room we will find Albus who will deliver us a piece of Dominus. Let's take it and, after the dialogue, continue to the right. Watch out for the swinging blade and the 2 Nuremberg Virgins, for the rest go right until you find an imprisoned villager: it's Abram, free him. Return to the previous room and go up one level, again pay attention to the Invisible Man and the Creature.
In the next vertical room 5 archer skeletons will be waiting for you, climb to the tip and then go right. Then continue to the next vertical room. In the middle on the right you will find a Rescue, and further up a point to use Magnes: to the right of that point is a rock to break to find the Konami Hero, then continue to the right. Here is another room divided into 2, full of Lancers and a new flying monster; clean up and save the orange cat at the top of the room, then go right. In the middle of the vertical room on the left we will find a teleporter, while on the right the way to the exit, but first we go down to the left. In this room we will not find monsters, but balls of current that will pass above and below us, with good timing avoid them and reach the back of the room for the Glyph Vol Fulgur (electric shocks). We go back and take halfway to the right, here two winged demons are waiting for us and, if we get caught by the surveillance lights, also a Tin Man. This is a die-hard monster, but with the new Electric Glyph you should do it; besides, if you manage to defeat him, there will be a beautiful treasure for you! Going to the right you will also find the chest containing the PortaGlifi. Once you get it, exit the level.