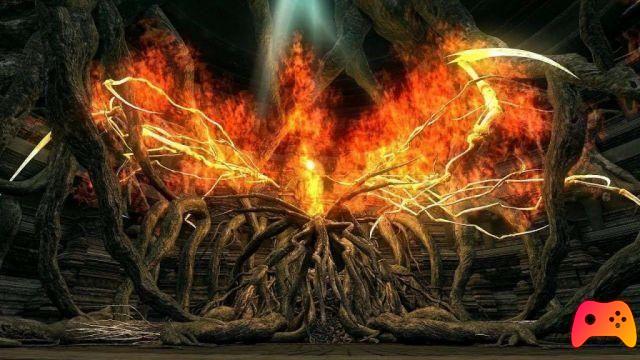
Hollow bastion
Sora is without his Keyblade so you can't destroy the Blocks or damage Heartless right now. Run along the path and check out the Moogle shop.
Use the save points and head to the wide door. You can't use it yet, you have to find the switch first. Head to the far right and use the elevator to go down to the Intracoastal Waterway. Hit the first switch, you now have ten seconds to hit the second switch to the right of the first. The wall disappears and you can move to the next area where you will find a blue switch. Hitting it will show a 20 second timer and waves of blocks will start falling towards you. Jump them and reach the other end to hit the red switch. Run to the back side to find a piece of the emblem.
Hit the new blue switch in the center and return to the Castle Gates. Go through the previously non-moving door to enter the Entrance Hall. After the cutscene you will have to survive some hand-to-hand fights, after which you can use Goofy.
Caution:
Pippo joined the team. Now you can use the attack commands with Goofy. There are three commands available:
Follow Me - Make Pippo follow Sora
Fight the Heartless - Have Goofy fight the Heartless
Destroy Blocks - Have Goofy destroy blocks
Pippo can also use Tornado with the command button. Use the controls to have Goofy defeat the Heartless.
Defeat the Heartless with the help of Goofy to start another event. On the right side of the staircase have Goofy destroy the Prize Rare Block to get Healing. Approach the Library and the green star for a piece of the emblem. Go back to the Entrance Hall and place the first piece of the Emblem, then follow Donald Duck to the Castle Gates. Have Goofy destroy the blocks and use the Bouncing Blocks to reach a Rare Prize Block above for an Aero +1. As you move towards the Intracoastal Waterway, have Goofy continue destroying the Blocks and destroy the Rare Prize Block for a Debug Device: A. Use the Bouncing Blocks to reach a Rare Prize Block containing a Lucky Strike. Get off at the Intracoastal Waterway once you have everything.
Have Goofy destroy the Bug Block and Rare Prize Block for an Esuna, then go to the area where you got the Emblem Piece and destroy the Rare Prize Block for a Magic: +1. Move to the area with a wall of Bug Blocks and use Goofy to destroy them. Go through here to find a blue switch that spawns numerous Blocks, use Tornado to switch and activate the switch on the other side before 25 seconds of the timer. The blue switch will be in the corner and will bring up more Blocks, easily destroyed by the Tornado; you will also find a Rare Prize Block which will give you an Exo Spark. Hit the red switch and run to Donald Duck.
Caution:
Donald has joined the team. You now have access to all of his attacks in addition to Goofy's. Use the Thundaga / Firaga attack with Donald Duck and Turbo with Goofy to clear your way along the Castle.
Use the nearby elevator and go back to the Library. Use the red switch on the back to access Library 3. Hit the blue switch and then the red switch to access Library 4. Hit the blue switch and then use the Ghost Blocks to reach the upper level of the libraries and the switch red. Destroy the Rare Reward Block to get Cure +3 then go to Library 3 through the new door. Don't fall down, keep walking from above to reach a Rare Reward Block to get Thunder +3. Now jump to the upper left corner and into Library 2.
Hit the blue switch and follow the pillars to reach a rare reward block and the red switch. Destroy all the Bug Blocks to get Mega Flare, then hit the red switch. Exit the Upper Level of the Entrance Halls and hit the blue switch then reach the red switch to create a piece of the emblem which can be reached in the central platform. Jump down and place the Emblem Piece then go to the Castle Gates. Locate the blue switch and hit it then jump between the blocks to reach the red switch; the key is to use Bouncing Blocks.
Defeat the Heartless and destroy more Blocks to reach the Emblem Piece. Destroy the Rare Reward Block to get Heat Dive and keep climbing the Blocks. Go through the opposite end and make sure the Damage Blocks are all gone so you can use the Bouncy Blocks to reach a Rare Reward Block that contains Aero Resistance +3. Go down and destroy another Rare Reward Block for Defense +1. Return to the Entrance Hall and use the last Crest Piece on the door to start an event where the team drives an elevator to the new location.
After clearing the Great Crest you will reach the High Tower. Hit the blue switch and make a mad dash to the opposite side of the area. Use the Bouncy Blocks to reach the first wall and destroy the numerous Bug Blocks to clear the second wall. Use Donald Duck's Thundaga to reach the Reward Block where the red switch is located to complete the Time Trial. Go down and reach the large wall, which was down where you completed the Time Trial, to start a System Area. Go back to where you started and look at the door at the top right of the curve on the map to enter the System Area.
Reward:
| items | Special Points |
| D-Blizzara | 1100 |
| Command Ring | 900 |
| HP +2 | 500 |
| Strength +1 | 500 |
| Magic +1 | 500 |
| Defense +1 | 500 |
| Fire Resistance +3 | 1100 |
| Magnera | 30 |
Close up - Multiplier: x4.0 - Use a Finisher
Second Floor - Multiplier: x5.0 - Kill 29 Heartless
Head down to where you started the System Area and save, then proceed through the door. After a long sequence of Events, Sora gets the Keyblade back and follows Peter into the Keyhole where they fight.
Boss: Peter
Peter has a large choice of attacks, but not all of them do much damage. He can roll, which inflicts Silence, adds Damage Blocks, and uses explosive miniatures for the scenario in addition to his normal combos. Hit him in the face with powerful attacks to advance to round two.
Pietro will start using Thunder, you can understand where he is going thanks to the yellow circle that follows you. Peter will use the same attacks along with this one. This time too, come closer and punch Peter.
After beating Peter, he will take Riku out, who is not fighting under his power.
Boss: Riku
Riku is quite weak in the first round. A good combo of attacks should be enough. He will use Rising Slash and Sliding Dash along with his normal attacks. The second round will start after reducing his HP and Riku will use a new attack that will shoot out of the Damage Blocks. In the third round Riku uses a new attack where he moves around the stage and lashes out at Sora in the air. You can't hit Riku in this phase so dodge him until the fight ends.
Grado
Rank S: 40000+ points
Grade A: 35000 - 39999 points
Grade B: 30000 - 34999 points
Grade C: 29999 points or less
Reward:
Grade C: Potion
Grade B: Cure
Grade A: Strike Raid
Grade S: Muscle Strike
Keyblade: Oblivion
Hollow Bastion - Riku's Data
Sora starts without his powers. The Matrix Power indicator at the top left indicates how long it takes to go back. Use the save point and the Moogle shop before moving on.
Go through the door to enter Corrupted Destiny Island. Start by connecting the Pair Blocks, one to the shed and the other to the dock for + 3% Matrix Power. Destroy the Reward Block near the shed for + 3% Matrix Power and then the Reward Block near the Secret Entrance for another + 3% Matrix Power. Head north of the docks to find a camouflaged Reward Block for a + 3% Matrix Power and a Rare Reward Block with a Debug Device: A. Climb the nearby ladder and grab another Reward Block with a + 3% Matrix Power. Cross the bridge that takes you to the island where Riku normally sits and destroy two camouflage Reward Blocks for + 6% Matrix Power, thus bringing him to a maximum of 20%. Enter the System Area on the island and hit it. To win the second challenge simply stand back and shoot until you defeat the snake.
Reward:
| Subject | Special points |
| CMOS Necklace | 2300 |
| Folding Fan | 1500 |
| HP +2 | 1000 |
| Strength +1 | 1000 |
| Magic +1 | 1000 |
| Triple Burst | 700 |
| Land Crash | 700 |
Close up - Multiplier: x4.0 - Don't use Heal commands
Second floor - Multiplier: x6.0 - Get hit less than 15 times
After winning the System Area, you will return to Riku's Data. Enter the new door to go to Corrupted Traverse Town. Use the Bouncy Blocks on the western side to reach the second level and jump onto the movable Metal Blocks. Go over the Pair Blocks to get Strength +3. Drive the Metal Block to the platform with a Reward Block and a Rare Reward Block for a + 3% Matrix Power and a Debug Device: A. To the right of the Accessories Shop is a Reward Block with a + 3% Matrix Power. Go through the door to reach the Second District instead of the Third. Destroy the nearby Reward Block for + 3% Matrix Power and go around the door to the First District. Climb the Metal Block to reach the roof and destroy the Rare Reward Block with an Aeroga.
Jump from here to a Reward Block with + 3% Matrix Power. Run over the Pair Blocks and hit him, then run through the Ghost Blocks to reach the Reward Block and get another + 3% Matrix Power. Jump down and connect the Pair Blocks for a +4 Fire Resistance. Opposite the door to the First District is a Reward Block with a + 3% Matrix Power, at the bottom left side, near the Hotels, is a camouflage Reward Block that contains the last + 3% Matrix Power. Enter the door of the First District and use the Bouncing Blocks to reach the roof of the Accessories Shop where a Rare Reward Block will give you +6 HP. Another Bouncy Block will take you to a roof with a Rare Reward Block containing an Aero Resistance +4. Enter the System Area and clear the three floors. To paralyze enemies use Thunder, to pass the second floor use Ether.
Rewards:
| Subject | Special Points |
| Spinner Saw | 3600 |
| Waistband | 3000 |
| Debug Device: R | 2400 |
| Defense +2 | 3000 |
| Lucky Strike | 2400 |
| Fire +4 | 3000 |
| Firaga Burst | 2400 |
Close up - x4.0 multiplier - Paralyze 5 enemies
Second Floor - x4.0 Multiplier - Defeat 5 enemies while the Clock Gauge is at max
Third Floor - Multiplier x5.0 - Fail attacks less than 10 times
After clearing the area you will return to Riku's Data. Enter Corrupted Wonderland and go north to enter Lotus Forest. Jump to the upper left corner and hit the blue Pair Block. Go down one level and break the Reward Block for + 3% Matrix Power and defeat the Camouflage Reward Block at the bottom to get another + 3% Matrix Power. Combine the Pair Blocks on the bottom floor, purple will give you a Curaga. Destroy two more Reward Blocks on the southern edge for + 6% Matrix Power, then jump to the northeast corner to find a Rare Reward Block containing a Blizzard Resistance. The Rare Reward Block in the southwest corner contains an Aero +3. The Reward Block in the center of the room has + 3% Matrix Power. Defeat two more camouflage Reward Blocks for + 6% Matrix Power then enter the System Area. To pass the second floor challenge use an Ether.
Reward:
| Subject | Special Points |
| Payback Ring | 1900 |
| Red Rose | 1600 |
| Debug Device: R | 800 |
| Blizzard +4 | 800 |
| Cure +2 | 800 |
| Blizzard Resistance +3 | 500 |
| Rising Rush | 500 |
Close-up - Multiplier: x4.0 - Get hit less than 8 times
Second floor - Multiplier: x5.0 - Use a Finisher
After clearing this world you will return to Riku's Data, head to Corrupted Agrabah now. Use the Bouncy Blocks to reach the Reward Block with a Spark Dive. Destroy the Reward Block to get + 3% Matrix Power and head around the corner. Destroy the nearby Reward Block for another + 3% Matrix Power and break the Explosive Block. Head to a recess where Bug Blocks hide a Rare Reward Block with a +3 Thunder Resistance. Where the boulders are spawned you will find a Reward Block with a + 3% Matrix Power. Around the corner use the Bouncy Block and the Ghost Block to reach a Reward Block with a + 3% Matrix Power. Go through some Explosive Blocks to reach a Rare Reward Block with the Stun Impact command.
Grab the + 3% Matrix Power from the Reward Block in the corner and head to the Reward Block in the upper right corner for a + 3% Matrix Power. On the left side, use the Bouncy Block to reach the Phantom Block and destroy the Reward Block for + 2% Matrix Power. The nearby Rare Reward Block will give you a Triple Burst, grab it and keep going up for another Rare Reward Block with a Tornado Tracer. Jump to the large area of Bouncing Blocks and reach the System Area. All challenges shouldn't pose a problem at this point.
Reward:
| Subject | Special Points |
| Immortal Charm | 5100 |
| Crystal Earrings | 4000 |
| Debug Device: R | 2700 |
| Mobile: +4 | 2700 |
| Strength +2 | 2700 |
| Magic +2 | 2700 |
| Thunder Tracer | 1000 |
First floor - Multiplier: x4.0 - Use two Finishers
Second floor - Multiplier: x5.5 - Complete in less than 60 seconds
Third floor - Multiplier: x5.0 - Destroy 30 Blocks
A fifth door will open leading to Corrupted Hollow Bastion.
Boss: Corrupted Riku
Riku will fight exactly like last time, he will be just a little bit faster. His swoop attacks will release some Damage Blocks and he will still use the shield which will limit your combos. Attack continuously and heal yourself if you take too much damage.
Head to the last escape area. It consists of a side scrolling session where you will lose life every time you fall. Use the blue blocks as switches to create new Metal Blocks. Near the end of the first stage you will need to mount a snake of Metal Blocks to reach the left corner. Stage 2 consists of a battle against Maleficent.
Boss: Dragon Maleficent
Maleficent will crash into the ground creating a green wave. Jump over it and start your assault. With enough damage it will drop down and it will be easy to perform powerful combinations. Watch out for the green fireballs that he will throw at you from the sky, you'll have to roll away to dodge them. Occasionally, a skill will appear below her, try to grab it in order to do a lot of damage.
| Grado | Reward |
| Grade C | / |
| Grade B | Chain Rave |
| Grade A | Elixir |
| Grade S | Blizzaga |
After a long series of events, you will return to the Great Hall. Save and head to the next door. You will find yourself in another minigame where Sora runs forward and fires beams from his Keyblade.
Boss: Darkside
Darkside will use his usual attacks with the difference that they will now be elementary. The strike of his left hand will cause ice spikes to pop out of the ground and his right hand will create fireballs that will hurl themselves at you as you attack. Darkside can hit you with his hand across the floor when he disappears. Dodge his attacks and you can attack for a while in peace. The battle shouldn't be too long or too hard.
Soon after, Darkside will transform into a Heartless Sora
Boss: Heartless Sora
Heartless Sora has low HP and low defense, but has a very powerful attack and a wide choice of these. His attacks consist of throws of all kinds of Keyblades, both aimed attacks and in multiple directions. Stand in positions to dodge Slidng Dash attacks so you can respond easily.
Round 2 will start with some clones. Defeat them and Heartless Sora will use a devastating barrage of Keyblade and at the same time be invulnerable. Dodge the attacks and attack when he is vulnerable by jumping into the yellow circle. This will give Sora an attack that will turn Heartless Sora into a Shadow. Defeat this shadow to win the battle.
Reward:
Objects: Device Debug: Y
Keyblade: Zero / One
After a long series of events Sora will find himself in Castle Oblivion.