1 - BETWEEN THE ANVUS AND THE HAMMER
TREASURES: 5
You will immediately start with a busy part, in fact you will have to climb the wagon to reach a safe place. You will be clinging to the bar, move to the left (going to the right the iron will bend) and reach the lower part of the wagon, use the various handles to climb the structure and when the message appears on the screen jump to reach the higher one, pass then to a yellow pipe and reach the top to hold on to the one on the left which will take you to another very long vertical one. After climbing it for a while it will fold, press the left stick forward and X to jump to reach the yellowish crack on the side of the car, move to the left, on the roof, until you reach an opening and you can reenter it, here you will have to use the seats to move forward until you are knocked out again, head right to return to the bottom and use a long yellow pipe to climb up. The convoy will move and a door will open on your left, jump here and then ahead to reach the top of the wagon, then climb the iron piece to reach the yellow ladders to get on the next piece of train, where you will have to immediately run into the corridor and jump to its end to avoid falling over the precipice. A movie will follow where you will be shown how you ended up in the middle of this slaughterhouse.
Resumed Nate's commands, approach the tree on the right, staying on the side of the ravine, to retrieve the first treasure, the Statue of the furious divinity, now go to the other tree, in flames, and pass into the hole between the wagons, passed which you will not be able to go back. Advance to pass into a narrow space among the debris, in the clearing where you will come to find yourself there will be the corpse of a person, take the gun and look ahead, on the ground near the flames, to see the second treasure, the Rasaswati Statue. Now open the wagon still standing by pressing Triangle and enter it, climb over the fence, take the bullets and shoot the lock on the chain to be able to create a passage: now look up, you will see a corpse, leaving the view still you will notice a sparkle on the arm of the deceased, fire a couple of shots to make it fall and retrieve the third treasure, the Tibetan Tobacco Bottle. Resume the path and you will have to immediately have the weapon ready to face the enemy that will come from the path, fire a couple of shots and an explosion will invest it, move until you reach a wall to break through by pressing Triangle and climb the crates until you reach the exit. Here do not jump to the wagon a little further on but grab the edge by pressing Circle and drop into the clearing of snow below on the left, here you can take the fourth treasure, the Buthan Lime Container, after which go up the black container to enter the wagon, reach the end and jump on the door to reach the gash in the roof and here you will witness a scene.
Once the movie is over, press any key to resume moving, go to the opening in the wagon and jump to the yellow pipe on the opposite side, move to the right and hoist yourself into the next structure, once you get up turn back to retrieve the fifth treasure, the Thogchag Amulet of Ghau, among the wreckage. Now all you have to do is keep walking until you reach the end of the level.
2 - IRRUPTION
TREASURES: 10
Follow your partner on the platforms and pipes until you reach a dead end, when it appears on the screen press the arrow Up to see a ladder, wait for Harry to get ready and press Triangle when asked, now start climbing the wall by moving to the left and reached under the next stairs jump to reach them, open the manhole at the top by pressing Triangle and here you are inside the museum. Immediately turn the camera to the right to find the first treasure, the Byzantine Gold Coin, above the chest near the wall, then move to the opposite side of the room to find another ladder to lower on the wall, hold down Triangle to make go up Harry and follow him until you get to the top floor: once here turn back to see a small iron platform where you will find the second treasure, the glass evil eye. Now approach your friend and go up the stairs on the right, repeatedly press Triangle to turn the valve and then return to follow him: jump on the yellow handhold and then towards the small platform in front, drop on the edge by pressing Circle and move left until you reach the floor, there will now be a scene, pay attention to what you see beyond the window, in fact you will notice a sparkle near the column. Move to the deposit, go right, go up the steps and go right again to retrieve the third treasure, the Ottoman Ring, in the corner of the room.
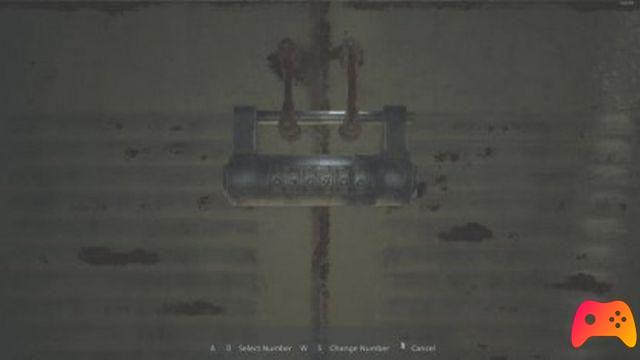
Take a few steps back and press Triangle in front of the door, after the short scene go back to the corridor from where you came and look up on the wall after the steps to see a box hanging on the wall, go up on the chest, press Triangle to deactivate the alarm and go back to Harry. Approach the man and press Square to stun him, go downstairs and do the same with the other guard while staying crouched near the flower bed. Follow your buddy again up the gate to reach the ledge above, move left and stand against the wall on the right, approach the men and press Square several times to knock them out with a combo. Go left and go down to the corridor below, wait for the guard to stop near the column and staying behind it press Square to grab the individual and slam him against the wall. Go up the stairs and wait for the guard below to turn his back to be able to go down undisturbed, hide behind the flowerbed and wait for the right moment to attack: remember the sparkle beyond the window that you saw earlier in the scene? Check near the column in the left corner from where you went down to retrieve the fourth treasure, the Silver Amulet Box. Reach Harry and you will find another alarm to deactivate, climb the gate and grab the ledge on the right, use all the others to get to a higher point where you can find the box to deactivate the device, go down and open the gate.
Move to the right, you will notice some guards patrolling the courtyard with a large fountain in the center, look closely at the latter to see the twinkle that indicates the fifth treasure, the Silver Belt Buckle, but you will first have to arrange a couple of men to be able to take it without being detected: first put the one near the column to sleep, then move on to the one near the fountain. Turn this counterclockwise and go up to the room behind the third guard, grab the wall and quickly press Square before it goes too far and warns its companions of the intrusion.
Go back and jump over the wall to hide from the other guards that will come out, wait for one to stand behind the columns on the left to be able to move and fix it, Harry will take care of the other. Reach him at the top of the stairs and follow him first on the roof, then on the window to get to the ledge on the left and be able to reach the next one beyond which you will witness a scene. Shoot the tranquilizer on the left guard (you can catch him anywhere, in the head it will have immediate effect while on the body you will have to wait a few seconds), run remaining hidden behind the left columns and this time put the guard on the right to sleep. Approach your partner and press Circle to crouch, then push the left stick forward to move the cart and reach the platform where the last two men hit were. Press the Up arrow when asked, now wait for Harry to prepare the rope for you to reach some ledges high on the wall, as soon as you are hanging here the door will open and a guard will come out, put him to sleep with the tranquilizer and resume moving to the right. Jump to the ledge in the corner of the wall and climb on the platform, drop on the edge of the beams that cross the room and reach the opposite side, here you will find a series of beams protruding from the wall, climb on them and reach the one on the far right where you will find the sixth treasure, the ivory chess horse.
Now go to the opposite side and go up the stairs, go out the window and walk along the corridor on the roof until you reach a point where the railing is missing, grab the ledge from the outside and jump to the roof on the other side. Now move to the narrow passage of the spherical structure, go to the roof and jump to the next one, climb the wall on the right and wait for Harry to prepare the rope. Grab it and swing and then fly to the large grate on the right, go down the ledge and move to the right, around the corner you will notice a piece of large pipe coming out of the wall, when you are on it drop down twice, first over the pipe and then on to the edge of this to retrieve the seventh treasure, the Ottoman bracelet. Now go back to the grate and climb it to reach the yellow handholds at the top right, when you are hanging on the edge of the roof press Square to eliminate the guard and then go up undisturbed.
Climb on the block in front of the reflector to be able to reach the ladder on the tower, move to the right and put the guard to sleep while hanging, reach the opposite side of the roof and press the Up arrow to take a look at your goal. Go down on the cover below and move to the right turning along the wall of the tower, at the end of the wall turn to the left and look on the wall, slightly above, to see a sparkle, shoot and go to the roof below to recover the eighth treasure, the Ancient pocket watch. From here, move towards the objective and jump to the next cover where Harry should be, put the guard to sleep and continue towards the tower. After the scene, approach the door and wait for your partner to open it and watch the cutscene that follows.
Don't stand still for long or the guards will target and hit you, keep moving between the columns or do somersaults to escape the laser sights. Turn the room counterclockwise until you reach a small niche on the left of the gate with the three men to get the ninth treasure, the Ancient Pipe, done that go to the only exit of the room. Run to the right, as soon as the gate closes turn right again and go down the stairs, jump against the wall at the bottom of them to reach the window and exit, run to the manhole, press Triangle to open it and go back underground. Go straight to go down the destroyed stairs, you will find yourself in a large space, skirt the wall on the left and you will find the tenth treasure, the jeweled bracelet, immediately after the second pipe. Move exactly to the opposite side to find a passage that will lead you up to the ladder, go up it and you will have finished the level.
3 - BORNEO
TREASURES: 4
Go straight into the swamp until you find the trunk with the first charge, after having triggered it, resume your journey and you will find yourself in front of a crossroads, looking to the left you will notice an oblique trunk, climb on it and observe the tip of the branch on the left of the bird to see a sparkle, shoot it and go get the first treasure, the Yuan Dynasty Coin.
Continue along this small channel and climb the rocks on the left, move along the path and at the end go down, go left and climb over the trunk, but don't move and stay crouched here until the guard stops turning his back near the big one. piece of wood, move slowly in the water and hide under the log, press Square to fix the man and then go and take care of the other one too. Look to the right, you will see another oblique trunk like the previous one, climb it and go down the opposite side to retrieve the second treasure, the Jade Animal of the Yuan dynasty, above the barrel. Go back and continue along the stream, there will be two more guards in the swamp and one high above the rock. Wait for the first guard to stop near the tree on the left to hit it from behind, unfortunately with the others you will hardly be able to do the same so take cover behind the trunk, take out your weapons and get ready to face five in all. Killed everyone, climb on the crates on the left and jump towards the horizontal pole that on the wooden scrap in order to reach the rock where the guard was at the top, cross the trunk that acts as a bridge and repeatedly press Triangle on the boulder to make it fall and create a ride for Sully.
Pass another natural bridge and get ready to face three more soldiers, a fourth is a little further on, in the lowered area. Now climb the wooden wall in front of the crate but instead of going to the path immediately after, move to the right where there are other holds and arrive at a path that will lead you to the top of a small waterfall where there are crossed wooden planks among them, here you will find the third treasure, the Pei Jade Pendant. Go back and take the previously avoided road that will lead you to the enemy camp where you will have to face many soldiers, but there are some things that will come in handy in doing this: scattered a little everywhere there are generators that you will recognize them by the red color , firing a few shots they will explode. The bulk, however, you will have to take them out with your aim and once you have finished you will have to go in search of the four charges, starting from where you arrived they are:
- in the left corner of the first platform, look to the left of the steps at the end of the path;
- in the right corner, in the water, always on the first platform;
- on the platform in front of the previous one, always remaining in the water, look on the left side;
- on the platform to the left of the area, on the lower left next to the generator.
Now go to the opposite corner on the left of the path you came from and press Triangle to make Sully climb the ladder, then climb it and a little further on, look to the right to see enemies in a pond. You will have to face them with your bare hands, press Square several times to make a combo but when you are grabbed quickly press Triangle to escape the grip and then immediately Square to counterattack. Knocked out all four, go up the rope that Sully threw and jump to the opposite side of the waterfall, take a few steps down the path and look to your left, near a large plant, to see some white ledges on the rock face, climb them and you will notice that the The view will change showing you some poles on the left of the screen, jump on these to get to the log above the pond, move to the right and arrived on the platform jump to the next one across the road from which you came, go up the natural steps and on the At the top, near the remains of a boat, you will find the fourth treasure, the Jade Chimera. Go back to Sully and follow the blue pipe to move forward.