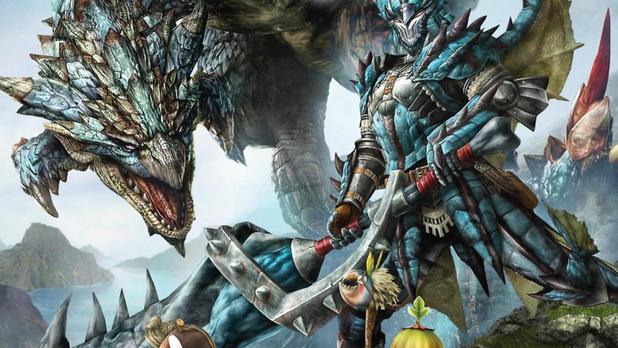
Guide Village missions 2 ★ di Monster Hunter Generations.
Here you will find our guide to Village 1 ★ missions
Here you will find the Village 3 Mission Guide ★.
The missions will take place in the maps: Jurassic Frontier, Dunes, Green Hills, Arctic Mountain and Misty Peaks. At the bottom of this guide you will find the mission URGENT.
Tour: Jurassic frontier
Main Objective: Survive until expiration or deliver Paw Pass Coupon
Secondary objective: -
Time limit: 50 minutes
Map: Jurassic frontier
This mission offers the hunter the opportunity to fully explore the Jurassic Frontier map, collecting and hunting everything. It is a good opportunity to get to know the map better.
Tours are useful missions for collecting materials. It is recommended to use the Palico because it does not get tired running and has infinite extraction objects, it also does not use objects so you can start the mission with an empty inventory (we also recommend a collector type companion).
When you are satisfied with the tour, go back to Area 1 and take the paw pass voucher from the blue box, hand it in the red box to finish.
NB: the paw pass voucher takes up a space in the inventory, so if you are full and don't want to give up anything you can send the items directly home from the NPC in Area 1.
Tour: Dunes
Main Objective: Survive until expiration or deliver Paw Pass Coupon
Secondary objective: -
Time limit: 50 minutes
Map: Dune
This mission offers the hunter the opportunity to fully explore the Dunes map, collecting and hunting everything. It is a good opportunity to get to know the map better.
Tours are useful missions for collecting materials. It is recommended to use the Palico because it does not get tired running and has infinite extraction objects, it also does not use objects so you can start the mission with an empty inventory (we also recommend a collector type companion).
When you are satisfied with the tour, go back to Area 1 and take the paw pass voucher from the blue box, hand it in the red box to finish.
NB: the paw pass voucher takes up a space in the inventory, so if you are full and don't want to give up anything you can send the items directly home from the NPC in Area 1.
Tour: Green Hills
Prerequisites: [Village 2 ★] Hunt the Velocidrome!
Main Objective: Survive until expiration or deliver Paw Pass Coupon
Secondary objective: -
Time limit: 50 minutes
Map: Green Hills
This mission offers the hunter the opportunity to fully explore the Green Hills map, collecting and hunting everything. It is a good opportunity to get to know the map better.
Tours are useful missions for collecting materials. It is recommended to use the Palico because it does not get tired running and has infinite extraction objects, it also does not use objects so you can start the mission with an empty inventory (we also recommend a collector type companion).
When you are satisfied with the tour, go back to Area 1 and take the paw pass voucher from the blue box, hand it in the red box to finish.
NB: the paw pass voucher takes up a space in the inventory, so if you are full and don't want to give up anything you can send the items directly home from the NPC in Area 1.
NB2: if you go with the hunter and not with the Palico bring a supply of Hot Drink.
Tour: Arctic mountain
Prerequisites: [Village 2 ★] The Mountain Tamer
Main Objective: Survive until expiration or deliver Paw Pass Coupon
Secondary objective: -
Time limit: 50 minutes
Map: Monte Arcico
This mission offers the hunter the opportunity to fully explore the Arctic Mountain map, collecting and hunting everything. It is a good opportunity to get to know the map better.
Tours are useful missions for collecting materials. It is recommended to use the Palico because it does not get tired running and has infinite extraction objects, it also does not use objects so you can start the mission with an empty inventory (we also recommend a collector type companion).
When you are satisfied with the tour, go back to Area 1 and take the paw pass voucher from the blue box, hand it in the red box to finish.
NB: the paw pass voucher takes up a space in the inventory, so if you are full and don't want to give up anything you can send the items directly home from the NPC in Area 1.
NB2: if you go with the hunter and not with the Palico, bring a supply of Fresh Drink.
Tour: Misty Peaks
Prerequisites: [Village 2 ★] Prince Arzuros
Main Objective: Survive until expiration or deliver Paw Pass Coupon
Secondary objective: -
Time limit: 50 minutes
Map: Misty Peaks
This mission offers the hunter the opportunity to fully explore the Misty Peaks map, collecting and hunting everything. It is a good opportunity to get to know the map better.
Tours are useful missions for collecting materials. It is recommended to use the Palico because it does not get tired running and has infinite extraction objects, it also does not use objects so you can start the mission with an empty inventory (we also recommend a collector type companion).
When you are satisfied with the tour, go back to Area 1 and take the paw pass voucher from the blue box, hand it in the red box to finish.
NB: the paw pass voucher takes up a space in the inventory, so if you are full and don't want to give up anything you can send the items directly home from the NPC in Area 1.
NB2: if you go with the hunter and not with the Palico, bring a supply of Fresh Drink.
Rowdy Rhenoplos (key mission)
Main Objective: Kill 5 Rhenoplos (Reward 600z)
Secondary objective: -
Time limit: 50 minutes
Map: Jurassic frontier
You will find the Rhenoplos in Area 6. When they run out you can stay in the same Area waiting for them to return. Rhenoplos closely resemble Triceratops, so they have armor on their back and head. Attach them from behind or from the side.
When you kill 5, the mission will automatically end.
Like the cacio sui Maccao
Main Objective: Kill 15 Maccao (Reward 1200z)
Contract fee: 100z
Secondary Objective: Wound the head of the Great Maccao (Reward 300z)
Big Monsters: Great Maccao
Time limit: 50 minutes
Map: Jurassic frontier
You will find the Maccaos in Area 6, 4, 5 and 8. In Area 5 you can stay waiting for them to return. The Gran Maccao also passes through Area 6.
When you kill 15, the mission will automatically end.
A juicy idea
Main Objective: Deliver 3 Ancient Berries (900z Reward)
Contract fee: 100z
Secondary Objective: Deliver 2 Water Lily Roots (Reward 300z)
Time limit: 50 minutes
Map: Jurassic frontier
You need to focus on the Larinoths. To get the Ancient Berries, wait for the Larinoth to feed from the trees in Areas 1 and 6. If you hit it while it is eating it will drop an Ancient Berry.
For the secondary objective wait for the Larinoth to drink in Area 2, then hit him.
A fern is forever
Main Objective: Deliver 20 Special Ferns (Reward 1200z)
Contract fee: 100z
Secondary Objective: Deliver 5 Abyssal Mushrooms (Reward 600z)
Big Monsters: Great Maccao
Time limit: 50 minutes
Map: Jurassic frontier
Special ferns are easily found in (grass) collection points throughout the map. For the secondary objective, look for Abyssal Mushrooms in Areas 10 and 11.
Beware of the Great Maccao.
Points at the border
Main Objective: Get 1000 Wycademy Points (Reward 1500z)
Contract fee: 200z
Secondary Objective: Hunt a Great Maccao (Reward 900z)
Big Monsters: Great Maccao
Time limit: 50 minutes
Map: Jurassic frontier
To accumulate points you need special objects that you can find both by collecting from collection points and by killing monsters.
Here are some useful items for scoring points:
Guano of Gargwa (25 points), killing Gargwa
special ferns (55 points) grass collection points
Eternal Moth (160 points) Insect collection points
Ambradrago piece (180 points) Stone collection points
Wyvern Tear (500 points) from Great Maccao
Gendrome traffic jam (key mission)
Main Objective: Hunt a Gendrome (Reward 1200z)
Contract fee: 100z
Secondary Objective: Kill 5 Genprey (Reward 600z)
Big Monsters: Gendrome
Time limit: 50 minutes
Map: Dune
Bring a supply of Fresh Drinks. You will find the Gendrome in Area 10 (also the Genprey). Throw a Paint Ball to track its movements.
The Gendrome can paralyze you with an attack, so if you have a Companion with awakening better.
The Gendrome escapes to Areas 7 and 3.
When you kill him the mission will automatically end.
The land shark (key mission)
Main Objective: Hunt a Cephadrome (1500z Reward)
Contract fee: 200z
Secondary Objective: Ride & Overthrow Monster x2 (Reward 300z)
Big Monsters: Cephadrome
Time limit: 50 minutes
Map: Dune
Bring a supply of Fresh Drinks. You will find the Cephadrome in Area 7. It will often hide in the sand, you can wait for it to come back up or throw a Sonic Bomb (found in the blue box in Area 1) at it, which will stun it. Throw a Paint Ball to track its movements.
The Cephadrome escapes to Areas 2 and 3.
When you kill him the mission will automatically end.
Kill the Genprey!
Main Objective: Kill 10 Genprey (Reward 900z)
Contract fee: 100z
Secondary Objective: Deliver 2 Carapaceon Brains (Reward 300z)
Time limit: 50 minutes
Map: Dune
Bring a supply of Fresh Drinks. You will find the Genprey in Areas 7 and 10. For the secondary objective, kill some Hermitaurs (found in Areas 2 and 9).
When you kill 10 Genprey the mission will automatically end.
Big game (key mission)
Main Objective: Kill 5 Hermitaurs (Reward 600z)
Contract fee: 50z
Secondary Objective: Deliver 3 Apceros Livers (Reward 600z)
Time limit: 50 minutes
Map: Dune
Bring a supply of Fresh Drinks. You will find the Hermitaurs in Areas 2, 3, 7 and 9. For the secondary objective, kill some Apceros (found in Areas 4 and 7).
When you kill 5 Hermitaurs the mission will end automatically.
Birthday berries
Main Objective: Deliver 5 Tropical Berries (Reward 600z)
Contract fee: 50z
Secondary Objective: Deliver 10 Fossil Bones (Reward 600z)
Time limit: 50 minutes
Map: Dune
Bring a supply of Fresh Drinks. You can find tropical berries in Areas 2, 6 and 7. For fossil bones just search the bone piles scattered around the map.
Legendary liver!
Main Objective: Deliver 5 Pool Livers (1500z Reward)
Contract fee: 200z
Secondary Objective: Kill 5 Cephalos (Reward 900z)
Time limit: 50 minutes
Map: Dune
Bring a supply of Fresh Drinks. Hunt the Cephalos in Areas 2 and 7, from their bodies you can find the livers. The secondary objective ends by making the primary objective.
Points in the dunes
Main Objective: Get 1000 Wycademy Points (Reward 1500z)
Contract fee: 200z
Secondary Objective: Hunt a Gendrome (Reward 1200z)
Big Monsters: Gendrome
Time limit: 50 minutes
Map: Jurassic frontier
Bring a supply of Fresh Drinks. To accumulate points you need special objects that you can find both by collecting from collection points and by killing monsters.
Here are some useful items for scoring points:
Meteorite Block (1000 points), Area 8
Goldstone Piece (200 points) Stone collection points
For the secondary objective find the Gendrome in Area 5.
Hunt the Velocidrome!
Main Objective: Hunt a Velocidrome (Reward 900z)
Contract fee: 200z
Secondary Objective: Kill 5 Velociprey (Reward 600z)
Large Monsters: Velocidrome
Time limit: 50 minutes
Map: Green hills
You will find the Velocidrome (and Velociprey for the secondary objective) in Area 5. The Velocidrome is a very fast monster, so novice hunters should carry fast weapons. Throw a paint ball to follow its movements.
When you kill him the mission will automatically end.
What a mess you are, Velociprey!
Main Objective: Kill 10 Velociprey (Reward 900z)
Contract fee: 100z
Secondary objective: -
Time limit: 50 minutes
Map: Green hills
You will find Velociprey in Areas 2, 3, 4, 8 and 10.
When you kill 10, the mission will automatically end.
Bullfango tango
Prerequisites: [Village 2 ★] Hunt the Velocidrome!
Main Objective: Kill 10 Bullfango (Reward 1200z)
Contract fee: 100z
Secondary Objective: Wound the Velocidrome's head (Reward 300z)
Large Monsters: Velocidrome
Time limit: 50 minutes
Map: Green hills
You'll find the Bullfangos in Areas 1, 3, 4, and 6. You'll find the Velocidrome for the secondary objective starting in Area 10.
When you kill 10 Bullfango the mission will automatically end.
Divin sashimi
Prerequisites: [Village 2 ★] Hunt the Velocidrome!
Main Objective: Deliver 3 Premium Sashimi (900z Reward)
Contract fee: 100z
Secondary Objective: Deliver a Goldfish (Reward 600z)
Time limit: 50 minutes
Map: Green hills
First fishing mission! To find premium sashimi, go to Area 11. Immediately to the left you will find a spring of water. First clear the area of any minor monsters, which can interrupt fishing.
In this spring you will also find golden fish for the secondary objective. To catch the premium sashimi use the bait found in the blue box in Area 1 (pressing Y will use the bait and only the premium sashimi will appear).
Points to the green hills
Prerequisites: [Village 2 ★] Hunt the Velocidrome!
Main Objective: Get 1000 Wycademy Points (Reward 1500z)
Contract fee: 200z
Secondary Objective: Hunt a Velocidrome (Reward 900z)
Large Monsters: Velocidrome
Time limit: 50 minutes
Map: Green Hills
To accumulate points you need special objects that you can find both by collecting from collection points and by killing monsters.
Here are some useful items for scoring points:
Wyvern Tear (500 points), from the Velocidrome on the map
Goldstone piece (200 points), stone collection points
Royal Kabuto (170 points), insect collection points
Wyvern Egg (1200 points), to be collected in Area 5 and transported to Area 1 (red box)
The mountain tamer
Main Objective: Hunt a Bulldrome (Reward 1200z)
Contract fee: 100z
Secondary Objective: Kill 3 Bullfango (Reward 300z)
Big Monsters: Bulldrome
Time limit: 50 minutes
Map: Monte Arcico
Bring a supply of Hot Drinks. You'll find the Bulldrome (and the Bullfango for the secondary objective) in Area 8. Throw a paint ball to track its movements.
The Bulldrome's only dangerous attack is charging, but it's easy to understand why the monster will move its front legs before charging.
Once the Bulldrome is killed, the mission will automatically end.
Kill the Giaprey!
Main Objective: Kill 10 Giaprey (Reward 900z)
Contract fee: 100z
Secondary objective: -
Time limit: 50 minutes
Map: Monte Arcico
Bring a supply of Hot Drinks. You will find the Giapreys in Areas 3, 5, 7 and 8.
Killed 10 Giaprey the mission will end automatically.
A pack of Blango
Prerequisites: [Village 2 ★] The Mountain Tamer
Main Objective: Kill 10 Blangoes (1500z Reward)
Contract fee: 200z
Secondary Objective: Ride & Overthrow Monster x2 (Reward 300z)
Big Monsters: Bulldrome
Time limit: 50 minutes
Map: Monte Arcico
Bring a supply of Hot Drinks. You will find Blangoes (white Gorilla-like creatures) in Areas 3, 6 and 8.
Killed 10 Blangoes the mission will end automatically.
Mountain herbs
Prerequisites: [Village 2 ★] The Mountain Tamer
Main Objective: Deliver 10 Mountain Herbs (Reward 600z)
Contract fee: 50z
Secondary Objective: Deliver 2 Tongues of Popo (Reward 300z)
Time limit: 50 minutes
Map: Monte Arcico
Bring a supply of Hot Drinks. For the secondary objective, kill the monsters you find in Area 1. For mountain herbs, look for the grass collection points in Areas 7 and 8.
Points in the tundra
Prerequisites: [Village 2 ★] The Mountain Tamer
Main Objective: Get 1000 Wycademy Points (Reward 1500z)
Contract fee: 200z
Secondary Objective: Hunt a Bulldrome (Reward 1200z)
Big Monsters: Bulldrome
Time limit: 50 minutes
Map: Monte Arcico
Bring a supply of Hot Drinks. To accumulate points you need special objects that you can find both by collecting from collection points and by killing monsters.
Here are some useful items for scoring points:
Mountain herbs (50 points), grass collection points
Larva di Khezu (400 points), from Area 8 after the small tunnel, stone collection point (carrying it you will lose life, you have to bring it to the red box in Area 1)
For the secondary objective you will find the Bulldrome in Area 7.
Prince Arzuros
Main Objective: Hunt an Arzuros (Reward 1200z)
Contract fee: 100z
Secondary Objective: Ride & Overthrow Monster x2 (Reward 300z)
Big monsters: Arzuros
Time limit: 50 minutes
Map: Misty Peaks
The Arzuros is a bear-like creature with long claws, you will find it in Area 5. Like the Bulldrome, the Arzuros charges its prey, so get ready to dodge.
Throw him a paint ball to keep track of his movements on the map.
Once killed the mission will end automatically.
Bye bye, Jaggia
Main Objective: Kill 8 Jaggia (900z Reward)
Contract fee: 100z
Secondary objective: -
Time limit: 50 minutes
Map: Misty Peaks
You will have to kill the Jaggia (Areas 2, 4, 5, 6 and 9). Once they are eliminated you can wait for them to return to the Area. After killing 8, the mission will automatically end.
Remember to collect the items from the Jaggia bodies.
Noises at night
Prerequisites: [Village 2 ★] Prince Arzuros
Main Objective: Kill 15 Jaggi (Reward 1200z)
Contract fee: 100z
Secondary objective: Wound front leg Arzuros (Reward 300z)
Big monsters: Arzuros
Time limit: 50 minutes
Map: Misty Peaks
You will have to kill the Jaggi (Areas 4, 5, 6 and 9). Once they are eliminated you can wait for them to return to the Area. After killing 15, the mission will automatically end.
Remember to collect items from Jaggi bodies.
For the secondary objective, you will find an Arzuros in Area 5.
Fungal fashion
Prerequisites: [Village 2 ★] Prince Arzuros
Main Objective: Deliver 10 Special Mushrooms (600z Reward)
Contract fee: 50z
Secondary Objective: Deliver 5 Sprouts + (Reward 300z)
Time limit: 50 minutes
Map: Misty Peaks
You will find the special mushrooms from the mushroom picking points in Areas 7 and 9. For the secondary objective, you will find the 5+ sprouts in Area 3 (go up the small stone step in the area).
Merchant Sunsnug shoots
Main Objective: Deliver 10 Sprouts + (900z Reward)
Contract fee: 100z
Secondary Objective: Deliver 3 Secret Supplies (Reward 300z)
Big monsters: Arzuros
Time limit: 50 minutes
Map: Misty Peaks
As with the previous mission, you will find the + shoots you need in Area 3 (go up the small stone step in the area). Access to this Area from Area 2 is blocked, however, so you will have to go around it.
For secret stash, take out the Melynx (black Felyne) that you find around the map (after attacking them a bit, they will escape underground leaving a sparkling object).
Points on the foggy peaks
Prerequisites: [Village 2 ★] Prince Arzuros
Main Objective: Get 1000 Wycademy Points (Reward 1500z)
Contract fee: 200z
Secondary Objective: Hunt an Arzuros (Reward 1200z)
Big monsters: Arzuros
Time limit: 50 minutes
Map: Misty Peaks
To accumulate points you need special objects that you can find both by collecting from collection points and by killing monsters.
Here are some useful items for scoring points:
Wyvern Egg (1200 points), to be collected in Area 8 and transported to Area 1 (red box)
Sprout + (60 points), grass collection points
Royal Honey (120 points), honey collection points
Royal Kabuto (170 points), insect collection points
Balsamite piece (180 points), stone collection points
For the secondary objective you will find the Arzuros in Area 5.
Once all the key missions have been completed, the urgent mission will be unlocked, completing which you will have access to the 3-star Village missions.
Whimsical fangs - URGENT
Main Objective: Hunt a Tetsucabra (Reward 2400z)
Contract fee: 300z
Secondary Objective: Wound Tetsucabra's jaw (Reward 300z)
Large monsters: Tetsucabra
Time limit: 50 minutes
Map: Jurassic frontier
You will find this monster (similar to a giant armored frog) in Area 3. Throw a paint ball at it to follow its movements on the map (it will move to Area 4, 7 and 9).
The Tetsucabra is quite slow and you will be able to swing on its sides quite easily, but be careful when it decides to roll on its back. Like all slower monsters, when it hits it takes a lot of life.
To break the jaw you will have to carry a fairly heavy weapon, the most suitable is the hammer. The Airplane style is particularly suited to such a big and slow monster.
Once the Tetsucabra is killed the mission will end automatically, remember to retrieve all the available items from his body.

