This guide will walk you step by step through the entire Mass Effect 2 experience. While fairly straightforward, the Bioware title allows for several moral and behavioral choices that could change the course of events. In addition, you will be helped in the strategic approach to fighting, in order to use your character and the various supporting actors that you will meet during the adventure to full capacity.
Before starting, you will be asked whether to impersonate a Male or a Female. The talents and the war possibilities of the two sexes are the same, only some dialogues will vary which, of course, will only be available for a certain sex in a particular situation.
If you start Mass Effect 2 on Xbox 360 or PC, and you also own the first episode, you can import the save and resume with your character. If, on the other hand, you own a Playstation 3, you can make the same choices as in the first chapter thanks to a quick digital graphic novel.
Contents
Page 1
1.0 - The Normandy
2.0 - Lazarus Research Station
3.0 - Freedom Progress
4.0 - Omega
4.1 - The Professor
4.2 - Archangel
5.0 - Purgatory Prison Ship
6.0 - Korlus
Page 2
7.0 - Horizon
8.0 - Illium
8.1 - the Justicar
8.2 - the Assassin
9.0 - Haestrom
10.0 - The Collector Ship
11.0 - The Wreck of the Reaper
12.0 - The Normandy under attack
Page 3
13.0 - Suicide mission
13.1 - Preparations and infiltration
13.2 - The biotic and the final battle
1.0 - The Normandy
After the quick opening cutscene with the Illusive Man, you'll find the Normandy and her crew. The ship will suffer a heavy attack, and only then will you take Shepard's command. Answer your mate (who can be Liara, Williams or Alenko depending on who you saved / loved in the first ME) and after a few more cutscenes you just have to follow the corridor of the bridge, destination cockpit. The road is quite simple: all you have to do is go straight and turn left at the first fork. Go up the stairs and continue forward, all along the bridge. Enjoy the show of the ship falling apart.
Once you reach the Joker, convince him to abandon ship and you will start the farewell cinematic of the Normandy… and Shepard.
2.0 - Lazarus Research Station
After a short cutscene you can change the character's name, appearance and class. The surname will obviously always remain Shepard, while you can give your alter ego the name you prefer. Change its appearance or choose the default appearance, and you'll find yourself having to decide which of the six classes to impersonate. For a more informed choice, we refer you to this page. If you still want a simpler and more immediate experience, the Soldier is the class for you. Conclude creation by choosing one of the three origins (Space, Settler and Terrestrial) and one of the three psychological profiles (Survivor, War Hero and Relentless).
You will find yourself on a bed, where a voice (Miranda's) will tell you that the structure you are in is undergoing an attack. Move to the locker and retrieve the gun. You don't have thermal clips (ammo) for now, so follow the arrow and crouch behind the cover. After the explosion, retrieve the clip and be guided by the directions. There will be the first enemy to take down. It's a security mech. Protect yourself behind some boxes and take it out quickly.
Go up the stairs and run to take cover behind the cover. Six mechs will arrive. Destroy them all, perhaps by trying some power supplied to the class to take the hand, (remember that if you shoot the head of the mech, the rest of the body will explode dealing damage to those nearby) and continue. First, pop into the left room to find a clip. You will witness the scene of a mech killing two scientists, but luckily you are protected by a glass. Open the door on the right and pick up the grenade launcher. Equip it and throw a grenade right in the center of the group of mechs that will come from the door.
Move right and use the elevator. Run through the flames and open the doors. If you want you can enter the room on the left to hear the recordings, while to continue you just have to go up the stairs.
Once at the top, follow the corridor to find a man (Jacob) fighting other mechs. Help him and he will start a speech. He will briefly explain the situation to you, after which the shooting will resume. If you want, help yourself with your powers or those of Jacob, but in any case the fight will prove to be very simple (note: the mechs will reappear indefinitely if you do not use Jacob's power at least once, this being a tutorial). At this point Jacob will provide you with more information.
Continue through the door and past a corridor with a clip, you will come to a red room. Kill the enemies and continue through the door, all the way up the stairs. As soon as you go up, on the left you will find a terminal with a registration of Miranda. If you don't care, go straight into the door and talk to the injured man (Wilson). Grab the medi-gel and use Cohesion from the power list to heal it. Mechs will attack the room. If you are an Engineer, use Overload to detonate the crates, otherwise use it from Wilson's power list.
After the dialogue, go through the door and you will find the first code to unlock. Is simple. Just select the images identical to the highlighted one without touching the red cells. Now go down the stairs and you'll find yourself in a large room crammed with mechs. Take them out, perhaps using your powers or allies, and move on. Turn left but don't go up the ramp right away, as another wave of enemies will come from above. Take them out and go up. In the door on the left you will find two more terminals to hack, one of which requires a different procedure, so simple that there is no need for explanations (it's like playing Memory).
Opening the door will trigger another cutscene, during which Miranda will appear. You decide the best way to behave, and after a long cutscene you will be led by the Mysterious Man. Follow the corridor and start an interesting discussion with him.
When you are ready, click on the door to start the next mission.
3.0 - Freedom Progress
As soon as you arrive on the planet, continue ahead of you and enter the small building. Exit and go down the stairs, following the directions on the screen. Once in front of the large hatch, check the boxes on the right for 1000 credits. When you open the hatch, quickly run behind the covers in front of you and take out the two Mechs in front. Be careful, because others will arrive from the right, and this time with two robot dogs running towards you. Take down those first and finally the two armed mechs, also taking advantage of the powers of Jacob and Miranda. Once the area is cleared, go up the stairs to the right and enter the building. Loot everything you find and when you come out watch out for two guard mechs (one is a dog). Check the boxes for some credits and move on.
Enter the room to find a small group of Quarians, among whom you will recognize Tali. After the dialogue, exit the room and go down the stairs. As soon as you enter the building below, a mech will revive, so be careful. Before exiting remember to hack the terminal, then open the door. You will find drone turrets ready to make your skin. Use any power that damages shields, such as Overload or Disruptor Ammo, and you won't have any problems. At this point enter the open building, collect the 100 credits and go back a few steps to open the door. Continue and you will also find here other turrets, to be knocked down with the same technique as before.
Approach the hatch a little further down and place Jacob and Miranda on either side of the large entrance, while you will hide behind the cover right in front. A movie will play. Now you will have to face a heavy Mech, a tough opponent to take down due to the shields and thick armor. The advice is to take cover behind the covers and lower his shield using Overload or Disruptor Ammo. Once the shield is destroyed, equip the grenade launcher and bomb the Mech with all the ammo you have, the fastest way to neutralize its armor. At this point, only the red health bar will remain, a trick to lower even with standard weapons. Of course, keep an eye on your health and that of the team, being ready to use Cohesion if the two party members should succumb (by taking refuge in the house to your left you will be able to shoot the mech from the windows without suffering almost any damage and avoiding that Miranda or Jacob go ashore).
After the fight, look at the two side buildings, in one of which you will find Tali, and loot everything that comes under fire, including a terminal to break into. Also take a look at the mech carcass on the side of the stairs. You will find Power-ups. Now you just have to go up the stairs and open the door. The Quarian Veetor will wait for you almost hypnotized in front of the monitors. In this circumstance you can perform a Hero action, turning off the monitors and forcing the Quarian to turn around, an action that will give you some Hero points. If, on the other hand, you want to behave differently, don't press any keys. When Tali arrives, let Veetor go with her if you want Paragon points, or take him with you if you're interested in Renegade points.
A long and intriguing interview with the Mysterious Man will await you, at the end of which you will meet the Joker and get hold of the new Normandy, the SR2. Once on board, talk to the entire crew. In particular, you will find Jacob in the armory, to the right of the elevator on the bridge, Joker in the cockpit, also on the bridge, and Miranda on the crew deck, in the room to the left. When you are ready, go to the bridge and select the tactical map, destination Omega.
If you want, you could also drop by the Citadel to talk to Anderson and to recruit Kasumi, but only if you've got the Kasumi's Stolen Memory DLC or if you own a PS3 copy.
4.0 - Omega
As soon as you disembark, if you have already unlocked it via the Cerberus Network, or if you have a copy for Playstation 3, you will find Zaeed Massani along the corridor of the spaceport. Talk to him and he will join your team. He is a mercenary and a very useful warrior in direct fire fights.
Enter the main station district. Look around for a while then continue towards the stairs where many people queue. The bouncers will let you in without a problem, so make your way to the Afterlife bar. The owner, Aria, an Asari, asked for you, so join her at the highest part of the place. Ask her where to find the two members of the team that named you the Illusive Man, namely Archangel and Mordin Solus. You can enlist them in the order you prefer, so the order of placement of their respective missions in this guide is totally arbitrary.
4.1 - the Professor
Mordin Solus is in the neighborhood closed for quarantine due to an epidemic. Exit Afterlife and head left, entering the rightmost door. Immediately turn right and try to convince the Turian on guard to let you reach the quarantine area. If you have already taken Archangel, avoid taking it with you, as only humans are immune to the strange epidemic that has broken out in the station.
Once you reach the forbidden area, move forward and peek behind the crates to find clips and 250 units of Element Zero. Now move down the hall and once you reach a block, turn right and collect a medi-gel from the box hanging on the wall. Reach the door guarded by a Turian and open it. A quick firefight against two Blue Suns awaits you, nothing to worry about. When you've killed them, don't open the door in front of you right away, but talk to a dying Batarian on your right. Ask him about Mordin, and when he starts coughing, decide whether to heal him for some Paragon points or let him die for Renegade points.
Now go inside the door, without continuing along the corridor behind the Batarian, but don't forget to hack the console for 5000 credits. As you enter, retrieve the heavy weapon ammo on the left and open the locked door. Take a look around the room, listening to all 4 recordings and go back. Continue along the corridor behind the Batarian and hack the door on your right to enter another apartment. Go out and keep going straight, being careful of some Blue Suns that will try to make you skin. Hide behind the covers and the fight will be very simple. Follow the directions on the screen and continue. You will find a closed door. Hack it to find 1000 credits and a couple of humans inside. Talk to them and after the dialogue check the wall behind them to find a safe with 4000 credits.
Exit and continue following the arrow, remembering to take a look at the fallen body of the mercenary to find the search for the damage of the rifle. In the corridor do not go up the stairs but continue past the columns, using them as a shelter to take down Blue Sun, Vorcha and Varren. The latter might bother you a little, so resort to powers like Stun Shot, Singularity or the good old shotgun. Against the Vorcha you can instead use Warp, or Incinerate and Incendiary Ammo, which block its regeneration. Some Krogan will also arrive at some point, so watch out.
After the fight is over, loot the clips and take a look at the door to the left of where you entered. You will find 250 units of Element Zero and another door. Open it to enter an apartment with two human looters. Quietly retrace your steps and follow the arrow to get to the clinic. Inside you will find a medical station with 100 credits, a wardrobe where you can change your paraphernalia but nothing more. Follow the arrow and enter the room opposite Mordin's for 100 credits, the medi-gel research and some units of Palladium. Now go talk to the Salarian. He will start talking to a machine and if you want Renegade points stop him as well. If you wait, you can stop him in a gentler way, earning Paragon points. After the dialogue, Mordin will give you the Carnifex M-6 cannon, a heavy pistol. Check the room and take everything you find (500 Element Zero, 2000 Palladium and 100 credits), then exit the clinic following the arrow and go up the stairs.
Take out the large group of Vorcha and check the room for a terminal to hack and a medical station with 100 credits. Follow the arrow, hack the console for 5000 credits and move on. In the first door you will find Mordin's protege being threatened by some Batarians. Resolve the situation as you see fit but be careful not to get Daniel killed. Get the 100 credits and enter the other door, remembering to save before continuing. Kill a small group of Vorchas and go down the stairs, beware of the Vorchas with the rocket launchers. Take them down first and without going down the ramp clean the area from above, teeming with opponents. Now drop down and continue, protecting yourself behind barrels to kill the Vorcha and Krogan with ease. Check the room carefully for 1100 credits.
Continue up the stairs and after the cutscene, take cover quickly. From now on, you won't be able to save between battles, so be especially careful. Quickly take down the Vorcha with the rocket launcher and try not to let those with the flamethrower approach (use a sniper rifle or a very well placed shot to hit the cylinders on their backs, so as to make them explode and damage those around). As soon as you have them all down, run to the bottom and insert the cure into the machine. You just have to reactivate the air conditioners. To do this, move to both sides of the room, trying to resist the waves of enemies as much as possible. In the right air conditioner room you will find a medical station with 1000 credits, while in the left one with 100 credits.
Turn both air conditioners back on and you'll find yourself in Mordin's clinic. He will join the team and all you have to do is return to the Normandy.
4.2 - Archangel
Go back to Omega Afterlife and talk to the recruiter at the back of the room. If you have created a female character, the mercenary will resist and to convince him you could act as a Renegade. Once the interview is over you will see a little boy intent on enlisting. If you want to be a hero, ask him how old he is and take the gun out of his hands. Now exit the room and head to the far right where there are the shuttles to reach the place where Archangel is hiding.
As soon as you arrive, talk to the Batarian and look for Sergeant Cathka. To find it, simply follow the arrow and keep your eyes peeled along the way. You will find an interesting datapad to give to Aria at Afterlife, and in the room with the Mech deactivated a datapad with 5000 credits, 500 units of Element Zero and a console to compromise the Mech (it will benefit you later in the level). In the room with the Vorcha firing, you will also find a datapad with 6000 credits on the floor. Stay in this room and follow the arrow to talk to Cathka. Ask him everything that interests you and if you want to behave as a Renegade to kill him and thus frustrate the tuning of the Gunship.
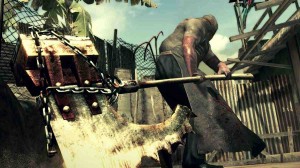
Now you will get into the action. Take out the team of freelancers by catching them from behind and go up the stairs. Check everywhere to find some hidden credits and take out the two who try to open the door. Enter and after a long conversation with Archangel (who turns out to be Garrus), in which you can also decide to receive Renegade points by shooting a mech, the real fight will begin. They are all synthetic enemies, so if you have powers like Overload or Disruptor Ammo, take advantage of them. More waves will come, including non-synthetic ones, so a power like Singularity will be very useful to quickly destroy enemies in a small area. Try not to let them get to the stairs, otherwise you will have to move and go and block them at the entrance. Of course, pay close attention to Garrus' vital signs.
After three waves, reach Garrus and you will see the Eclipse captain arrive and bring the Heavy Mech to the field. If you compromise him he will start killing his own comrades, so one less job for you. If you have forgotten to do it, it becomes more difficult. Take down the other mercenaries first and only then focus on him. Once you've stopped this wave as well, take some time to inspect the room (you'll find 2000 credits and the Vindicator M-15 assault rifle) and look for the numerous clips scattered all over the place if you're short on ammo. Also, in the back room you can grab 4100 credits and going down the stairs, inspect a shelf to find damage research for tech skills.
When you are ready, go to Garrus. He will tell you to go down and stop the mercenaries trying to breach from the back. Decide whether to bring the whole team with you or leave a man to give Garrus a hand (risky choice for you, only do it if you feel able) and go down the stairs. Move following the arrow, inspect the medical station to get 100 credits (if you want to change weapons using the locker) and continue down the stairs. As soon as you are ready, press the button to close the tailgate. The door takes a few seconds to seal, so kill the enemies until the entrance is closed, perhaps using some area power like Singularity or Incinerate, or a heavy weapon like the grenade launcher. Once sealed, move right and take out the Vorchas in the area. Gain ground and approach the portcullis at the bottom. Close it in the same way as the previous door and move quickly to the next one. Of course check the room first and you will find 100 credits in a first aid box.
Now go ahead, open the door and take out the Vorchas sheltered behind the covers. When you turn the corner, be very careful, because three Vorchas, one of which is armed with a flamethrower, await you impatiently. Take cover behind the wall and take them out. Quickly move to the door and close it killing Krogan and Vorcha who will try to get through. Once the rear is secured, you will find yourself back in the main room, below where Garrus is. Quickly take out the Vorchas and run to brake the two fierce Krogan before they reach Garrus. Use a shotgun if you can, or use all useful attacks in close combat.
Now you will have some quiet again. Recharge and when you are ready talk to Garrus. The Gunboat will come to break the boxes. If you killed Cathka before he finished fixing her, the fight will be easier. First take down the Blue Suns and they will drop with a rope, some of which are protected by shields and barriers. After the first wave you have to go to the stairs and kill the enemies that are below. Garrus will be badly injured during a cutscene and you will be left with the awkward task of taking down the Gunship. Use heavy weapons, to easily penetrate its armor, and powers like Incendiary Ammo and Incinerate. Once the Gunship is destroyed, the mission will end and you will end up on the Normandy.
At this point you can decide whether to enlist the prisoner (Jack / Subject Zero), the Krogan Okeer or go to the Citadel to buy some supplies.
5.0 - Purgatory Prison Ship
Head to the Hourglass Nebula in the Osun system and dock at the Purgatory prison ship to enlist the prisoner, a biotic named Jack. Once docked, move up to the guard who will ask you to hand over your weapons. After a short tour you will be left free to wander around the area. Follow the corridor and you will see a guard beating an inmate. Talk to him and if you have a high level of Paragon or Renegade points you may be able to stop him. Further ahead is another prisoner to talk to and gather information with. Continue down the corridor and open the door. At this point you will be attacked by multiple waves of opponents. Take them out as you see fit and follow the arrow.
Kill the guards along the way and, after opening the door, be sure to silence the technician in the room forever. Activate cell opening. After the cutscene, check the location for Element Zero and 100 credits and move on. In the room with the destroyed Mechs you will find a damage protection research and, further down the hall, ammo for heavy weapons and 1000 credits. You will arrive in a large destroyed hall, where you will have to fight against guards, prisoners and a heavy mech. The fight will be quite simple, as long as you play your cards right. In front of the door take the damage from the shotgun and hack the dead guardian's terminal. In the next room, as soon as you open the door, get the heavy weapon ammo and 4500 credits.
After the short corridor you will come to a room with a lower area full of boxes and covers. Some snipers hiding on the mezzanines will steal some time, but taking them out will still be a joke. Keep going and hide often to escape enemy fire. Use area powers capable of damaging biological opponents and you will have no difficulty. But pay close attention to a heavy mecha at the end of the path. Protect yourself behind cover and rely on powers, trying to use the heavy weapons as little as possible. Once the fight is over, take 1500 credits from a corpse and move on. In this anteroom you just have to take everything, remember to hack the terminal, and open the door.
After a short cutscene you will start the fight against Kuril. The first thing to do is take down the three generators that power the shield. To do this you will obviously have to clean up the annoying mercenaries, using all the covers under fire as cover, and shoot down the generators by shooting them in the center. As soon as you lower your shields, take out Kuril quickly to kick off a cutscene and then a quick talk with Jack. To get her on board, promise to let her see the Cerberus files (provided you can not keep them in the future, but in that case, forget her trust).
6.0 - Korlus
As soon as you disembark, follow the road for a few meters and take cover behind the covers as soon as you are attacked by the Blue Suns. Take them all out and go on, obligatorily speaking with the wounded mercenary. If you want Paragon points, give him the medi-gel and, after receiving the information, let him go. If you are aiming for the Renegade score, don't give him any help and when he talks to his companions despite your ban, shoot him. Further ahead you will find some Blue Suns that will shoot you from an elevated position. Just take cover and take them out from afar.
Walk until you come across a wounded Krogan (remember to take 100 credits on the way). Help him by killing the mercenaries above the walkways and talk to him. After a short interview ask him to show you the laboratory. He will open the way for you and you can pass. Watch out for two Blue Suns that will pop out suddenly, with no shelter where you can hide. Take them out using the squad powers and take cover behind the L-shaped cover to take down a ferocious Krogan without too much trouble.
Now there are two tactics: either stay in a safe spot and wait for the Krogan to come towards you, or try the hardest way and advance while the enemy forces are not finished yet. In any case, once you have killed all the Krogan remember to take 2000 units of Platinum. Hack the door and move on. In this room, pick up the shotgun upgrade, a medi-gel, heavy weapon bullets, and some ordinary ammo, and then, when you're ready, move on.
Immediately run to cover to dodge a rocket, and kill the opponents over the cliff. If you have a sniper rifle this is the best time to take it out, but be very careful with rocket launchers. An excellent strategy is also to take down the protection of the opponents and hit them with area powers. Once killed, head up the ramp and take cover around the corner to safely take down other pesky mercenaries. Always continue sheltering, as beyond the walkway you will find other Blue Suns equipped with missile launchers. First take down the armored mercenaries, then take out the ones with the rocket launchers using the sniper rifle or using biotic powers like Shockwave (Jack's devastating main power). Now bypass the datapad and open the door.
You will arrive in a large hall with many mercenaries, most of them heavily armored. Kill the ones armed with rocket launchers first, and only then take down all the others. It may not be an easy fight, so take some time to organize your team in the best way. Often use powers like Overload or Disruptor Ammo. When you have cleared up, examine the last fresh corpse and continue to the right. You will be attacked all along the bridge, by several waves of opponents. Behave as you have done before and now and you shouldn't have too many problems. In the front room, get 4000 credits, heavy weapon ammo and open the door.
Climb the long staircase and immediately run for shelter. Another annoying wave of Blue Sun awaits you. There is nothing new to add. If you've made it this far, you've already learned by heart the best way to get rid of these mercenaries in blue suits. The only useful tip is to be wary of overhead and armored opponents. Get rid of the former first and then, thanks to powers such as Overload, the latter, obviously giving priority to those armed with missile launchers. Once you clear the elevated area, go up and take out the mercenaries below you. Hold on and you'll be able to clean up the area.
Go ahead and hack the terminal in the next room to find 4000 credits. Now all you have to do is open the door and talk to Okeer. After a long dialogue, grab the Krogan vitality boost from a terminal near the door and go through it to go fight Jedore. The fight will prove very difficult: the mercenary will unleash her many Krogan clones and activate a heavy Mecha. First take down the Mecha, and only then clean up the big Krogan. At this juncture, never look for direct confrontation, but instead make good use of the covers offered. At this point, with no more protection, killing Jedore will prove to be child's play.
Return to Okeer to find his corpse. You just have to call the Normandy and have the capsule with the Krogan created in a test tube brought on board. On the ship it will be up to you to decide whether to awaken him, and therefore have a new valid violent member of the team, or whether to leave him hibernated forever.