Arrival in Silent Hill
After the opening scene, leave the public toilets. Continue to the left, pick up the map placed in the car, and go down the steps next to the white van. Continue along the path until you find the gate to the cemetery. Once the discussion with Angela is complete, head north - east, go through the gate and continue straight towards the path. Once in the city, you will find bloodstains on the asphalt that continues eastwards. Collect your drink in front of the garage, then turn right again into an alley. Open the gate on the right, collect the drink on the left and save the game. Once this is done, always continue straight down the street, until you hear a distorted noise from a radio. Go through the wooden bars, and take out the monster. After the animated scene, redo the same path as before. Look at the map, and head south to Neely's Bar. As soon as you arrive, head to the map on the counter and mark the points described on the other on your map. Head to Martin Street (see map), examine the corpse and collect the key. Continue west to get to the Wood Side Apartments.
Wood Side Apartments
Enter the hall, pick up the map on the left and save to the right. Go up the stairs and open the second floor door. Continue north, then enter room # 205. Collect the torch from the mannequin, and eliminate the monster. Head west and return to the stairs via the white door in the center of the corridor. Arrived on the third floor you will witness an animated scene. Go straight north and then enter the room on the left. Collect the gun from the trolley and exit the room. Go back to the second floor, go to room N ° 208, examine the wardrobe and take the key to room N ° 202. Go to the room pronounced now, enter the bedroom on the right, put your hand in that hole in the wall to receive the watch key. Head back to No. 208, and go right towards the grandfather clock. Use the key obtained earlier to start a puzzle. You will have to place the small hand on 9 and the large one in the middle of 1 and 2. Once this is done, move the clock to make sure that you can continue thanks to a crack in the wall. Exit the room you are in and open the door on the left. Go up the stairs to get to the third floor. Enter room # 307. Once the cutscene is over, collect the key from the closet (where you were hiding in the cutscene) and stock up on healing items in # 303. At the end of the corridor (near the bars), collect the key to the emergency exit from the ground and the pistol cartridges in the supply room to the left. Now you have to go down to the ground floor, and follow the long corridor that will lead you to a pack of Juice in a Can, take it. Head to the second floor, enter the supply room and place the pack of Canned Juice on the garbage. Once this is done, exit the apartments and head towards that alley that divides the two buildings. Examine the garbage, pick up the Old Man's Coin, reenter the Wood Side Apartments and open the north door to the courtyard. Carefully enter the courtyard pool and, paying attention to the monsters, retrieve the Serpent Coin from the pram. Go back to the courtyard and enter the opposite side, reaching room 104 for some bullets. Finally go to 101, continuing to the bathroom: you will get to know Eddie, although not in the best of circumstances. Exit and go to the second floor. Use the Emergency Exit Key on the blue door, and a short cutscene will start right after.
Blue Creek Apartments
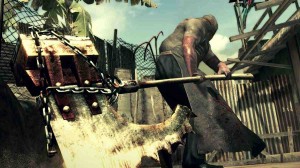
Continue to the bathroom to the north, and examine the toilet to get a wallet containing a sheet of paper with a code written on it. Proceed into the next room and go to the safe you find to start a puzzle. Relying on the code found in the wallet, you will have to enter the numbers following the direction indicated by the arrows, clockwise if it points to the left, counterclockwise if it points to the right. In hard mode, Roman numerals can be found, in some cases alongside normal ones. Once the code has been entered exactly, the safe will emit a noise and then open. There will be supplies inside. A drink is in the kitchen instead. Exit the room and continue east until you find an emergency door, open it. Collect the map of the apartments from the ground, and go down the stairs until you reach the emergency door on the lower floor. Continue west, retrieve a med kit from the supply room, and immediately enter the room on the left. Collect some ammo on the sofa, then enter the room on the left. Once the cutscene ends, pick up the Prisoner's Knife and coin. Go to room 105 and examine the desk to access a new puzzle. You will have to insert the coins in the right spaces; below the predisposition of the coins for the various difficulties: Easy: Old - Prisoner - empty - Snake - empty. Normal: Blank - Old - Prisoner - Blank - Snake. Difficult: empty - Old - empty - Snake - Prisoner. Very Hard: Old - empty - Snake - Prisoner - empty. As a reward for your success, you'll find Lyne's Room Key. From where you are now, exit to the balcony and go through the next room to find ammo and the Service Exit Key. Save, exit and reach the blue door, which you will unlock with the key you just obtained. After the short animated scene, you will have to fight against Pyramid Head. The only strategy for this fight is not to strike but to flee. Dodge the deadly shots from the boss for about 4 - 5 minutes, after which you will hear the sound of an atomic alarm and the boss will leave. Go down the stairs and open the door on the right to exit the apartments.
Rose Water Park
Go down the stairs, go up the alley to the east and start the cutscene. Head north to get to Rose Water Park. Collect various supplies for the gardens, then go straight to the central street. Once this is done, turn left to start an animated scene again. Exit the area and consult the map to get to the Texxon Gas (defend Maria from any danger, if she dies it's Game Over!). At your destination, collect the Steel Pipe from the car and the various supplies scattered in front of the van. Continue to Pete's Bowling (see map), and enter the facility.
Pete's Bowling
Maria will remain outside, while you will follow the only accessible path. There will be an animated scene: as soon as you resume the controls, go out and talk to Maria. Walk around the building until you reach a violet beyond the gate. Examine the end of the alley, then retrace it in reverse until you stop at a door that your traveling companion will open. Inside there will be some medicines, go out and reach the main street, towards the south, until you see Laura. Follow it until you reach the entrance to the hospital.
Brookhaven Hospital
Grab the Map from the wall, then enter the first room in front of you, save if you want, and read the documents. In the next room be sure to get the Purple Bull Key. Then look at the map and head to the women's locker room on the second floor, examine the bear and get a bent needle out of it. In the closet you will find a nice Rifle. Then enter the men's one to find a key in the pocket of a hanging coat. In Outpatient 3 there is a Kit and a typewriter that you will have to examine to derive a code. Room M2 has the Lapis Lazuli Eye Key, M3 and M6 have supplies. Now go back to the first floor and unlock the door of the clinic, there are bullets and a blackboard to examine. Now head to the double doors leading to the Patient Wing. There will be a coded puzzle to be formulated, especially with the one read on the blackboard. The code for those who play Easy or Normal is 7335, otherwise there will be a T-code to be entered, that is to say that the numbers to be pressed form a T on the keyboard so the combination must have only these numbers: 1328. Paying attention to the nurses, enter room S3 where you will let Maria rest for a long time. Get the Roof Key which is on the coffee table, then go to the S11 for medicine and rescue. Go up to the roof, pick up the Diary and try to go out the other door (the one you entered is blocked). After a short animated cutscene, you'll find yourself in a padded cell in the Special Treatment department, be healed right away if you're playing in Normal or Hard Action Mode. Examine the traces of blood on the wall to crack a code (which will be more or less legible depending on the Enigma difficulty chosen at the beginning). Go to the third floor and enter the S14, where we will find another puzzle again. It's not really a puzzle, as you need to have all the keys and codes on hand to open the box. What you need is: the code taken from the typewriter, the one written in blood, the Purple Bull Key and Lapis Lazuli Eye. Even if it does not exist, retrieve the found object and exit the room. Look at the map and head to the showers, combine the Bent Needle with the Hair to pull out the Elevator Key. Use the key on the elevator and go down to the first floor. In C3 there are bullets, in C2 there is Laura. Immediately after the enemies are eliminated, an animated scene will start.