Search
Search
Search

App for writing books on Android and iOS. Your passion is writing books and novels then these apps will be useful on your smartphone or tablet.Thanks to...


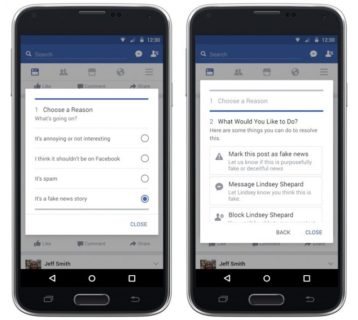
How to block hoaxes on Facebook. Facebook has finally taken steps to curb the spread of fake news with the help of new tools. The...


How to control Netflix from your smartphone on PC. You are watching Netflix on your PC and would like to remotely control it with your phone.We often...


Review for Phoenix Wright: Ace Attorney Trilogy. Game for Nintendo 3DS, Nintendo Switch, PC, PlayStation 4 and Xbox One, the video game was released on 17/04/2014 The...


![]() Sitemap 2026 / epictrick.com
Sitemap 2026 / epictrick.com ![]()
![]()
![]()